Imagine sinking your teeth into a slice of pure joy, a tender, moist crumb bursting with a subtle sweetness and vibrant explosions of color, all perfectly encased in a smooth, delightful glaze. It is a treat that promises to put a smile on your face with every single bite.
I remember the first time I whipped up something similar for a surprise birthday party; the gasp of delight from guests when they saw the colorful creation was more rewarding than any Michelin star. It was utter chaos and sprinkles everywhere, but absolutely worth it!
Reasons Why You’ll Love This Treat
This delightful creation isn’t just a cake; it is an experience, offering an incredibly easy preparation that welcomes even the most novice bakers. Its unique flavor profile, infused with the creamy essence of vanilla ice cream, sets it apart from traditional loaves. Beyond its fantastic taste, the stunning appearance, complete with colorful coated candies and rainbow sprinkles, makes it a feast for the eyes, perfect for any celebration. Plus, its versatility means you can easily customize flavors to match your mood or occasion.
Unveiling the Magic Behind the Mix: Understanding Your Ingredients
To create this wonderful bread, it is crucial to understand the role each ingredient plays in bringing forth that moist, flavorful texture and festive appearance. Here’s what you need for this delicious dish:
- **Self-rising flour** This flour contains both leavening agents and salt, making your baking process simpler by eliminating the need to add these separately. It is the backbone of our loaf, providing the structure and rise for a tender crumb.
- **Melted vanilla ice cream, softened** This is the secret ingredient that gives our loaf its incredibly moist texture and subtle sweetness, directly contributing to the “joyful treat” aspect. Ensure it is fully melted but not warm, maintaining its cool creaminess to achieve the best batter consistency. The vanilla essence provides a comforting base flavor.
- **Colorful coated candies, such as M&M’s** These vibrant morsels are the heart of the “Funfetti” in our loaf, adding bursts of color and a delightful textural contrast. Choose your favorite small, coated chocolates to embed that playful surprise throughout the bread.
- **Powdered sugar** This finely milled sugar is essential for creating a smooth, lump-free glaze that drapes beautifully over the finished loaf. Its delicate texture ensures a silky topping.
- **Milk** Used in the glaze, milk helps adjust the consistency from a thick paste to a pourable, luscious topping. Start with the smaller amount and add more slowly until your desired thickness is achieved.
- **Vanilla extract** A touch of vanilla in the glaze enhances the overall sweetness and complements the subtle vanilla notes from the ice cream, adding depth to the flavor.
- **Rainbow sprinkles, for topping** These festive sprinkles are the final flourish, creating that iconic celebratory look. They are scattered over the wet glaze, instantly transforming the loaf into a cheerful centerpiece.
All ingredients with their exact quantities can be found in the recipe card below.
Getting Started: Preparing Your Space
Before diving into the mixing, a little preparation goes a long way. Setting up your workstation ensures a smooth and enjoyable baking experience. This vibrant ice cream loaf is a simple project, making it perfect for bakers of all skill levels.
Preheat and Prepare Your Pan
Preheat your oven to 350°F (175°C). Take a 9×5-inch loaf pan and either grease and flour it thoroughly or line it with parchment paper. This step ensures your wonderful creation will easily release from the pan after baking, preventing any unfortunate sticking incidents.
Mixing the Batter
In a large bowl, combine the self-rising flour and the melted vanilla ice cream. Mix these two ingredients until they are just combined. It is important to be careful not to overmix the batter, as overmixing can lead to a tough loaf rather than the tender, moist crumb we are aiming for in this delightful baked good.
Adding the Festive Candies
Once your basic batter is ready, gently fold in the colorful coated candies. These little gems are what truly make this a funfetti loaf, scattering vibrant bursts of color throughout the mixture. Use a spatula to carefully incorporate them so they are evenly distributed without crushing them.
Filling the Loaf Pan
Pour the prepared batter into the greased and floured (or parchment-lined) 9×5-inch loaf pan. Use your spatula to spread the batter evenly across the bottom and into the corners of the pan. This will help ensure an even bake and a beautifully shaped loaf.
Baking to Golden Perfection
Place the filled loaf pan into your preheated oven. Bake for 45-55 minutes, or until a wooden skewer inserted into the center of the loaf comes out completely clean. This test confirms that the inside is fully cooked and ready to be removed.
Cooling Down the Loaf
Remove the bread from the oven and allow it to cool in the pan for 10-15 minutes. This initial cooling period helps the loaf firm up before it is moved. After this time, carefully transfer the warm loaf to a wire rack to cool completely. Patience here is key for a perfect finish before adding the glaze.
Crafting the Sweet Glaze
While the bread cools, you can prepare the glaze. In a small bowl, whisk together the powdered sugar, milk, and vanilla extract until the mixture is completely smooth. If you desire a thinner consistency for your glaze, add more milk a teaspoon at a time until it reaches your preference. This sweet topping will complete your delightful treat.
Glaze and Sprinkle Finish
Once the bread has completely cooled, pour the prepared glaze evenly over the top, allowing it to drip down the sides for an appealing look. Immediately scatter the rainbow sprinkles generously over the wet glaze. The sprinkles will adhere beautifully, adding that signature festive touch to your funfetti loaf.
Setting the Stage for Enjoyment
Allow the glaze to set for about 15-20 minutes before you begin slicing and serving. This short waiting period ensures the glaze hardens slightly, preventing it from running too much when cut. Garnish with a few extra sprinkles if desired and serve to enjoy this joyful treat.
Why This Colorful Treat Deserves a Spot in Your Recipe Repertoire
There is something undeniably magical about a loaf that brings such vibrant joy with minimal effort. This ice cream bread isn’t just a dessert; it’s a mood booster, a perfect centerpiece for casual gatherings, or a delightful surprise for a quiet afternoon coffee break. The sheer simplicity of combining self-rising flour with melted ice cream to create such a moist and tender crumb is truly revolutionary for home bakers. Imagine serving this at your next potluck or birthday party. The oohs and aahs are practically guaranteed!
This recipe is incredibly versatile. While the vanilla ice cream and colorful candies make for a classic and joyful treat, the possibilities don’t end there. Feel free to experiment with different ice cream flavors to truly make this loaf your own. Strawberry ice cream could create a lovely pink hue with a fruity essence, chocolate ice cream would yield a rich, decadent version, or even mint chip for a refreshing twist. The key is to ensure the ice cream is fully melted but still cool, maintaining the perfect batter consistency for that ideal bake. Remember, the journey of baking should be fun, and this recipe offers plenty of room for creative exploration without overcomplicating things.
Tips for a Perfect Loaf Every Time
Achieving a perfect loaf is within your reach with just a few simple considerations. Firstly, paying attention to the melted ice cream’s temperature is crucial. It needs to be fully liquid but not warm, as warmth can negatively affect the batter’s texture and the final bake. Think of it as a cool, creamy base that gently mixes with the flour. Secondly, the temptation to overmix is real, especially when you are excited about making something so colorful. However, remember the golden rule of quick breads: mix until just combined. Overmixing develops gluten too much, leading to a tough, dense loaf instead of the light and airy texture we crave.
Lastly, when it comes to storage, this particular ice cream bread holds up beautifully. Store any leftover slices in an airtight container at room temperature for up to three days. This ensures that each slice remains as fresh and delightful as the first, allowing you to enjoy the happiness it brings for a little longer. Sharing is caring, but sometimes, a slice reserved for yourself is pure self-love. So go ahead, whip up this funfetti loaf for a joyful treat and brighten your day, or someone else’s!
Nutritional Information for Your Delightful Loaf
Curious about what goes into each delightful slice of this colorful creation? Here is an estimated breakdown of the nutritional content per serving to help you plan your treat. This information provides a general overview for those mindful of their dietary intake, allowing you to enjoy this joyful treat with awareness.
- **Servings:** 8-10 slices
- **Calories:** 350 (Estimated per serving)
- **Protein:** 5g (Estimated per serving)
- **Carbs:** 55g (Estimated per serving)
- **Fat:** 12g (Estimated per serving)
This scrumptious bread offers a satisfying balance, making it a wonderful addition to any celebratory menu or a fantastic pick-me-up throughout your week. Enjoy the vibrant flavors and fun appearance!
Improving the Cooking Method

For the best results with this delightful bake, prioritize precision. Ensure your oven is fully preheated before the batter enters. Resist the urge to overmix the flour and ice cream; a few gentle folds are key for a tender crumb. Always let the bread cool completely on a wire rack before glazing for a beautifully set, non-runny finish.
Decorate Your Dish with Your Personal Touch
Embrace your creative side! Instead of vanilla ice cream, consider a strawberry or chocolate flavor to infuse a different base note, as suggested in the notes. You could also swap out the colorful coated candies for another type of candy-coated chocolate, or even use different shades of rainbow sprinkles for a specific theme or holiday.
Smart Tips for Storage and Reheating
To keep your wonderful loaf fresh, store any leftovers in an airtight container at room temperature for up to three days. This method helps maintain its moist crumb and prevents the vibrant glaze from becoming tacky or losing its appeal. Serve at room temperature for optimal flavor and texture.
Practical Chef Advice
One sunny afternoon, my niece and I whipped up this joyful treat, and her face lit up with every sprinkle. Seeing her delight in the vibrant colors and sweet flavors made every step pure magic.
Final Thoughts
As you’ve seen, creating this delightful treat is wonderfully straightforward, transforming simple ingredients into a festive masterpiece. The tender, moist crumb, infused with a subtle sweetness from the vanilla ice cream, perfectly complements the satisfying crunch of colorful coated candies. This vibrant loaf isn’t just a dessert; it’s a celebration in every slice, guaranteed to bring smiles. Don’t let another moment pass without experiencing the simple joy of baking this eye-catching bread. Get into your kitchen, gather those few items, and prepare to **Whip Up This Funfetti Loaf for a Joyful Treat** that will brighten any day.
PrintWhip Up This Funfetti Loaf for a Joyful Treat

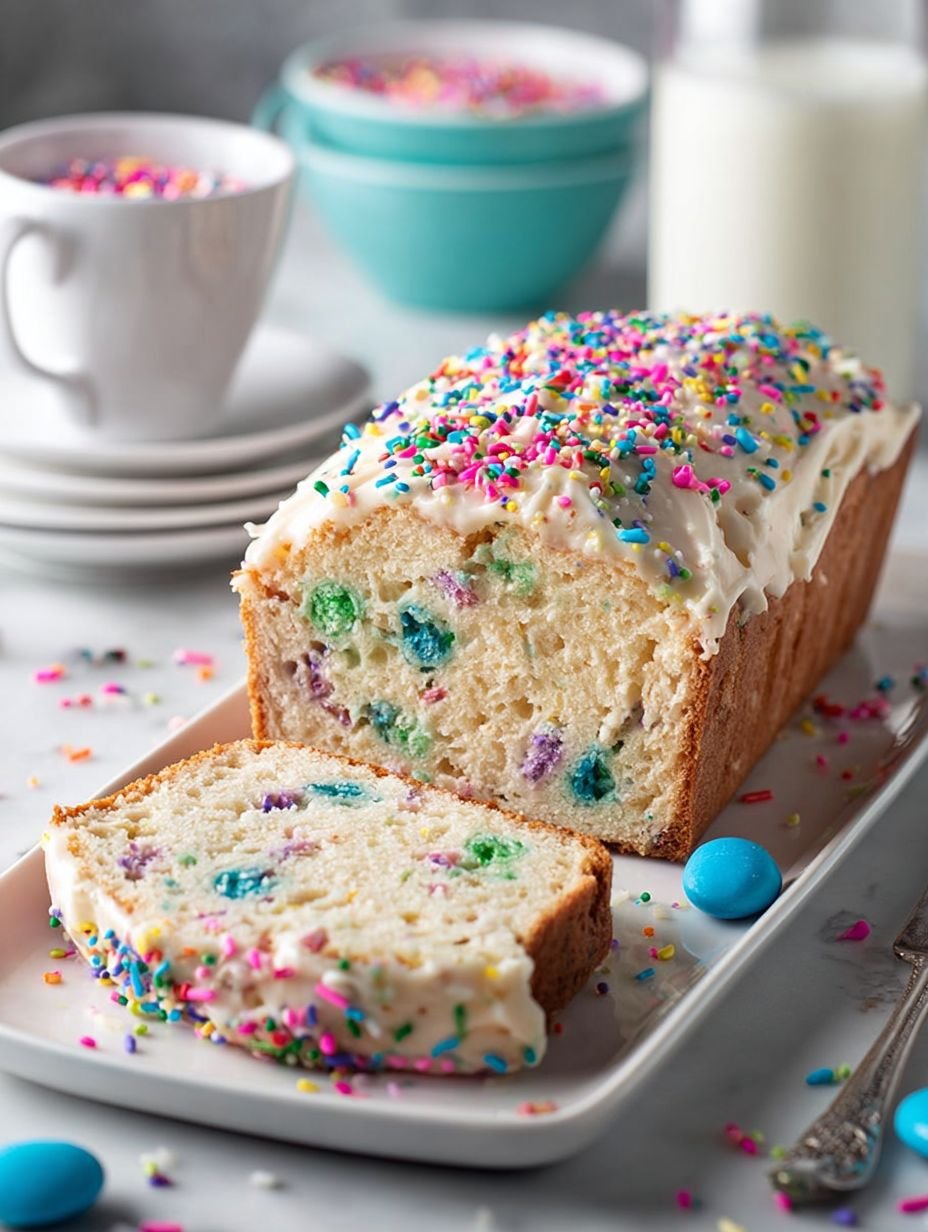
This delightful Ice Cream Bread offers a tender, moist crumb with a subtle sweetness. Infused with the creamy essence of your favorite ice cream, it features vibrant bursts of color from coated candies throughout. A smooth, sweet glaze and a generous scattering of rainbow sprinkles complete this festive baked loaf, making it a charming treat for any occasion.
- Prep Time: 15 minutes
- Cook Time: 45-55 minutes
- Total Time: 0 hours
- Yield: 8-10 slices 1x
Ingredients
- 1 ½ cups self-rising flour
- 2 cups (1 pint) melted vanilla ice cream, softened
- ½ cup colorful coated candies, such as M&M's
- For the Glaze:
- 1 ½ cups powdered sugar
- 2–3 tablespoons milk
- ½ teaspoon vanilla extract
- ¼ cup rainbow sprinkles, for topping
Instructions
- Preheat your oven to 350°F (175°C). Grease and flour a 9×5-inch loaf pan, or line with parchment paper.
- In a large bowl, combine the self-rising flour and melted ice cream. Mix until just combined, being careful not to overmix.
- Gently fold in the colorful coated candies.
- Pour the batter into the prepared loaf pan and spread evenly.
- Bake for 45-55 minutes, or until a wooden skewer inserted into the center comes out clean.
- Remove the bread from the oven and let it cool in the pan for 10-15 minutes before transferring it to a wire rack to cool completely.
- While the bread cools, prepare the glaze: In a small bowl, whisk together the powdered sugar, milk, and vanilla extract until smooth. Add more milk a teaspoon at a time if a thinner consistency is desired.
- Once the bread is completely cool, pour the glaze over the top, allowing it to drip down the sides. Immediately scatter the rainbow sprinkles over the wet glaze.
- Allow the glaze to set for about 15-20 minutes before slicing and serving.
Notes
For a different flavor profile, experiment with various ice cream flavors like strawberry, chocolate, or mint chip.
Ensure the ice cream is fully melted but not warm, to achieve the best batter consistency.
Do not overmix the batter; overmixing can lead to a tough bread.
Store leftover Ice Cream Bread in an airtight container at room temperature for up to 3 days.
Nutrition
- Calories: 350 (Estimated per serving)
- Fat: 12g (Estimated per serving)
- Carbohydrates: 55g (Estimated per serving)
- Protein: 5g (Estimated per serving)
FAQs
What type of ice cream should I use for this recipe?
The recipe specifically calls for 2 cups (1 pint) of melted vanilla ice cream. Using vanilla ice cream provides a neutral, sweet base that allows the flavors of the colorful coated candies and the vanilla extract in the glaze to shine through. The most important thing is to ensure your ice cream is fully melted but not warm before you combine it with the self-rising flour. This temperature control is crucial for achieving the ideal batter consistency and preventing any issues with the texture of your baked loaf.
Can I use a different type of flour instead of self-rising flour?
This recipe is specifically designed around self-rising flour, which already contains leavening agents and salt. These components are essential for the bread’s tender, moist crumb. If you were to use all-purpose flour, you would need to add baking powder and salt separately to replicate the self-rising flour’s properties. However, for best results and to ensure the exact texture and rise intended by this particular recipe, it is highly recommended to stick with self-rising flour as listed in the ingredients.
Why is it important not to overmix the batter?
Overmixing the batter is a common pitfall that can lead to a tough and dense bread rather than the desired tender and moist crumb. When you combine the self-rising flour with the melted ice cream, mix until the ingredients are just combined. Stop as soon as you no longer see streaks of dry flour. The goal is to develop the gluten minimally, ensuring your funfetti loaf remains light and airy, creating a much more enjoyable eating experience for everyone.
How should I store the leftover Ice Cream Bread to keep it fresh?
To maintain the freshness and delightful texture of your baked loaf, it is important to store any leftovers properly. Once the bread has completely cooled and the glaze has set, transfer it to an airtight container. This helps prevent the bread from drying out. You can then store the container at room temperature. When stored correctly, your delicious Ice Cream Bread will remain fresh and enjoyable for up to 3 days, perfect for continued joyful snacking.