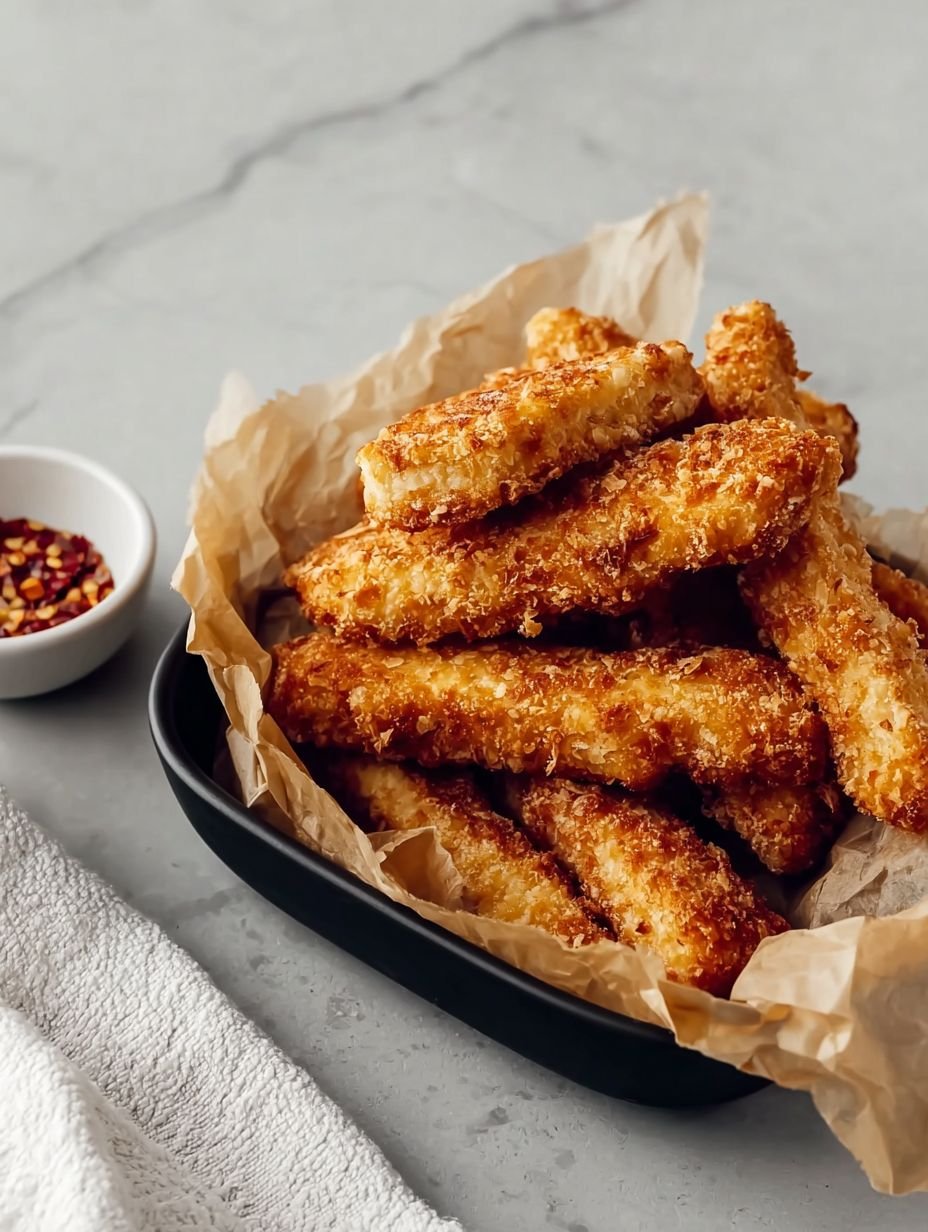
Imagine a symphony of textures: a satisfying crunch that gives way to tender, flaky tuna, all kissed with savory seasonings and baked to golden perfection. This isn’t just a meal; it’s an experience.
Just last week, my nephew, a notorious ‘fish hater,’ devoured these in minutes, convinced I’d invented a new, delicious form of chicken nugget that conveniently bypassed all his culinary objections.
This recipe truly shines because of its effortless preparation, transforming simple pantry staples into a dish that feels gourmet. The flavor profile is a delightful surprise, balancing the savory notes of tuna with aromatic spices and a creamy binder, creating a taste that’s both comforting and unique. Visually, these golden-brown beauties are utterly stunning, presenting beautifully whether as a sophisticated appetizer or a fun family meal. Plus, their versatility is unmatched, easily paired with various sauces or sides, making them a chameleon in your kitchen.
Ingredients
Here’s what you need for this delicious dish:
- **2 cans (5 oz each) tuna in water, drained very well** This is the star of our show! Opt for tuna packed in water and ensure you drain it exceptionally well. Squeeze out every last drop of liquid to prevent a soggy mixture, which is crucial for forming firm, perfect sticks.
- **1/4 cup mayonnaise** The binder that brings everything together, providing moisture and a touch of creamy richness without overpowering the tuna’s natural flavor. It helps create a smooth, cohesive base for our fish sticks.
- **1 large egg, lightly beaten** This egg acts as another essential binder for the tuna mixture, ensuring the sticks hold their shape beautifully during handling and baking, preventing any crumbly catastrophes.
- **1/4 cup finely chopped fresh parsley** Fresh parsley adds a bright, herbaceous note and a pop of vibrant green color, lifting the overall flavor profile and making the sticks visually appealing. Make sure it’s finely chopped for even distribution.
- **1 teaspoon onion powder** A pantry hero that provides a deep, savory, and slightly sweet onion flavor without the moisture or texture of fresh onions. It’s fantastic for building a robust base flavor.
- **1/2 teaspoon garlic powder** Another fantastic savory enhancer, garlic powder offers a mellow, aromatic garlic essence that complements the tuna beautifully. It’s a quick way to add depth.
- **1/4 teaspoon black pepper** Freshly ground black pepper adds a hint of piquant warmth, balancing the other flavors and adding a subtle kick to the seasoned tuna.
- **1/4 teaspoon salt** Essential for seasoning, salt brings out and intensifies all the other flavors in the tuna mixture, ensuring each bite is perfectly balanced and delicious.
- **1/2 cup all-purpose flour** The initial dredge for our sticks, creating a dry surface that allows the egg wash to adhere properly, forming the crucial first layer for our crispy coating.
- **1 large egg, beaten (for dredging)** This second beaten egg acts as the “glue” that binds the Panko breadcrumbs to the tuna sticks, creating a sturdy, even coating that crisps up beautifully in the oven.
- **1 1/2 cups Panko breadcrumbs** Ah, the secret to those perfectly crispy baked tuna fish sticks! Panko breadcrumbs are larger and flakier than regular breadcrumbs, which means they absorb less oil and become incredibly crunchy when baked, providing that irresistible golden crust.
- **2 tablespoons olive oil, plus more for greasing** Olive oil is key for both greasing the baking sheet to prevent sticking and, more importantly, drizzling over the coated sticks. This ensures an even, golden-brown crust and contributes significantly to the ‘crispy’ texture during baking, without deep frying.
All ingredients and quantities can be found directly in the recipe card below.
Why Choose Baked Over Fried?
Let’s face it, the allure of deep-fried food is undeniable. But when it comes to homemade fish sticks, baking is truly where it’s at. Not only does it make cleanup a breeze – no splattering oil to contend with – but it also offers a lighter, less greasy result without sacrificing that satisfying crunch we all crave. Baking allows the natural flavors of the tuna and seasonings to shine through, rather than being overshadowed by heavy oil. Plus, for those of us trying to keep things a bit healthier, opting for an oven-baked method means you can enjoy these delightful treats with a clear conscience. It’s a win-win situation for both your taste buds and your kitchen. This approach truly highlights the ‘baked’ in our perfectly crispy baked tuna fish sticks.
Step-by-Step Instructions
Simply follow these easy steps to prepare this delicious meal:
Step 1: Get Ready to Bake
Preheat your oven to a robust 400°F (200°C) to ensure a perfectly crispy exterior. Line a baking sheet with parchment paper, then lightly grease it with olive oil or cooking spray. This crucial first step prevents sticking and ensures easy removal of your culinary creations.
Step 2: Craft the Tuna Mixture
In a medium bowl, combine the very well-drained tuna, 1/4 cup mayonnaise, 1 lightly beaten egg, the finely chopped parsley, onion powder, garlic powder, black pepper, and salt. Mix these ingredients gently until they are just combined. Be careful to avoid overmixing, as this can lead to a tougher texture in the finished sticks.
Step 3: Set Up Your Dredging Station
Prepare your breading assembly line by placing the 1/2 cup all-purpose flour in one shallow dish, the second beaten egg in another, and the 1 1/2 cups Panko breadcrumbs in a third shallow dish. This organized setup will make the coating process smooth and efficient.
Step 4: Form the Sticks
Take about 1-2 tablespoons of the prepared tuna mixture. Gently form each portion into a uniform stick shape, aiming for approximately 3-4 inches long and 1 inch wide. The precise size helps them cook evenly. Repeat this process until all the mixture has been shaped.
Step 5: Coat for Crispy Perfection
This is where the magic happens for perfectly crispy baked tuna fish sticks! Dredge each tuna stick first in the flour, ensuring it’s fully coated, then gently shake off any excess. Next, dip it into the beaten egg, allowing any extra egg to drip off. Finally, roll it thoroughly in the Panko breadcrumbs, pressing gently to ensure a thick, even coating that promises maximum crispiness.
Step 6: Prepare for Baking
Arrange all the coated tuna sticks in a single layer on your prepared baking sheet. Ensure they have a little space between them for even air circulation. Drizzle or lightly spray the tops of the sticks with the remaining 2 tablespoons of olive oil. This extra oil is vital for achieving that desirable golden-brown and crispy crust.
Step 7: Bake to Golden Perfection
Bake the tuna sticks in your preheated oven for 15-20 minutes. Remember to flip them halfway through the baking time to ensure both sides achieve a beautiful golden brown color and an irresistible crispy texture. Keep an eye on them to prevent overcooking.
Step 8: Serve and Enjoy
Serve your beautifully baked tuna sticks immediately with your favorite dipping sauce. A squeeze of fresh lemon juice or a side of sriracha mayonnaise makes for an added flavor boost, truly elevating this delightful dish.
Unlocking the Crispy Secret: The Tuna Mixture
The foundation of truly excellent tuna sticks lies in the mixture itself. Beyond just a medley of ingredients, attention to detail here makes all the difference. The crucial first step, as mentioned in our notes, is ensuring your tuna is *very well drained*. And I mean, like, Olympic-level draining. Squeeze out every last drop of water. Why? Because excess moisture is the enemy of crispiness and can lead to a crumbly, hard-to-form stick. Think of it as building a strong culinary foundation. Once your tuna is dry, the combination of mayonnaise and the lightly beaten egg acts as the perfect binder, holding everything together without making it overly wet. The fresh parsley, onion powder, garlic powder, black pepper, and salt aren’t just for flavor; they infuse every fiber of the tuna with aromatic goodness, making each bite incredibly satisfying. Getting this mixture right is the first step towards achieving those truly crispy baked tuna fish sticks.
Perfect Pairings: Serving Suggestions for Your Tuna Sticks
While these delectable tuna sticks are fantastic on their own, pairing them with the right accompaniments can elevate your meal from great to unforgettable. The simplest yet most effective addition is a squeeze of fresh lemon juice, which cuts through the richness and brightens the overall flavor profile. For those who enjoy a little heat, a creamy sriracha mayonnaise offers a delightful kick, creating a dynamic contrast. Think outside the box too! A zesty homemade tartar sauce, a sweet chili dip, or even a creamy avocado ranch dressing could be phenomenal. Beyond sauces, consider serving them alongside a crisp green salad, a colorful quinoa pilaf, or even tucked into warm pita bread with shredded lettuce and a drizzle of yogurt sauce for a Mediterranean twist. These baked delights are incredibly versatile, ready for whatever culinary adventure you envision.
Meal Prep & Make-Ahead Tips for Busy Cooks
Life gets hectic, and having delicious, homemade options ready to go is a game-changer. These tuna sticks are incredibly accommodating for meal prep. One fantastic tip from the recipe notes is to prepare them ahead of time and freeze them raw after coating. Simply arrange the coated, uncooked sticks on a baking sheet and pop them into the freezer until they are completely solid. Once frozen, you can transfer them to an airtight container or freezer bag, making sure to separate layers with parchment paper to prevent sticking. When you’re ready to enjoy, bake them directly from frozen, adding just a few extra minutes to the cooking time until they’re golden brown and perfectly crispy. This strategy ensures you always have a wholesome, quick meal or snack at your fingertips, proving that deliciousness doesn’t always require last-minute effort.
The Wholesome Side of Baked Tuna Sticks
Beyond their irresistible flavor and satisfying crunch, these baked tuna sticks also offer a wholesome nutritional profile that makes them a smart choice for any meal. Each serving provides a substantial 25 grams of protein, essential for muscle repair and keeping you feeling full and satisfied. With only 12 grams of fat, much of which comes from healthy olive oil and mayonnaise, they are a far cry from their deep-fried counterparts. The 28 grams of carbohydrates come from the Panko breading and offer a good energy boost. Plus, at just 320 calories per serving, these perfectly crispy baked tuna fish sticks fit comfortably into various dietary plans without feeling restrictive. It’s a testament that healthy eating can be incredibly delicious and utterly enjoyable, proving that you don’t have to sacrifice flavor for well-being.
Your New Favorite Go-To Appetizer or Meal
Whether you are looking for a quick weeknight dinner solution, a crowd-pleasing appetizer for your next gathering, or a fun and healthier alternative to traditional fried options, these perfectly crispy baked tuna fish sticks tick all the boxes. They are easy to make, packed with flavor, and offer a satisfying texture that will win over even the pickiest eaters. So go ahead, grab your cans of tuna, get those Panko breadcrumbs ready, and prepare to embark on a culinary journey that promises delicious results. These are more than just fish sticks; they are a ticket to a delightfully crunchy, utterly satisfying meal that you’ll want to make again and again.
Perfecting the Cooking Process
To achieve **Perfectly Crispy Baked Tuna Fish Sticks**, prioritize proper tuna draining. This prevents a soggy mixture. Form your sticks gently but firmly, ensuring even shapes for uniform cooking. Remember to flip them halfway through baking for that coveted golden crispiness on all sides.
Add Your Personal Touch
Feeling adventurous with your tuna sticks? Try substituting the fresh parsley with dried dill or chives for a different aromatic note. You could also swap plain mayonnaise. Use a zesty lemon-infused version or a touch of smoky paprika mayo, transforming the flavor profile.
Storage & Reheating
To keep these delightful baked tuna sticks at their best, store leftovers in an airtight container. Refrigerate for up to two days. For optimal crispiness, avoid the microwave. Instead, pop them into a preheated oven or air fryer until warmed and perfectly crunchy.
Helpful Chef Tips
The first time I whipped up these tuna fish sticks, my picky partner, a lifelong chicken nugget devotee, was utterly shocked. He absolutely loved them. A delicious triumph!
Final Thoughts
You’ve now uncovered the secrets to creating truly exceptional baked tuna fish sticks. From the gentle mixing of the savory tuna blend to the satisfying crunch of the Panko coating, this recipe offers a delicious journey for your taste buds. Imagine biting into that golden-brown exterior, revealing a tender, flavorful interior—a perfect harmony of textures and tastes. These delightful creations are not only incredibly easy to prepare but also provide a wholesome, fulfilling meal that everyone will love. Don’t wait; experience the joy of making and tasting these perfectly crispy baked tuna fish sticks in your own kitchen today!
PrintPerfectly Crispy Baked Tuna Fish Sticks

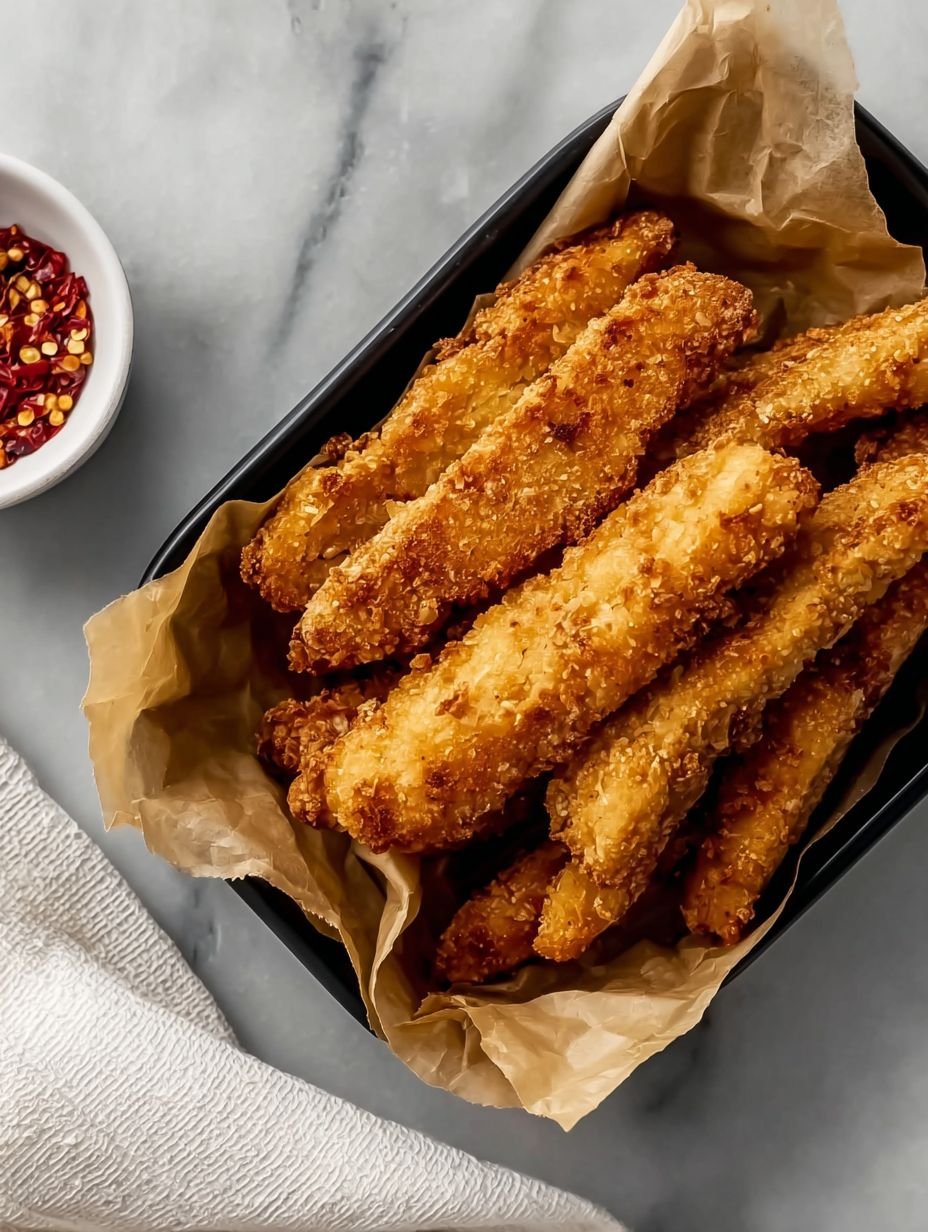
These baked tuna fish sticks offer a delightful combination of textures and savory flavors. Flaky canned tuna is seasoned and formed into convenient sticks, then coated in a crisp, golden breading. Baked to perfection, they achieve a satisfyingly crunchy exterior that gives way to a tender, flavorful interior. This preparation method yields a light yet fulfilling dish, perfect for a quick meal or appetizer.
- Prep Time: 20 minutes
- Cook Time: 15-20 minutes
- Total Time: 0 hours
- Yield: 4
Ingredients
- * 2 cans (5 oz each) tuna in water, drained very well
- * 1/4 cup mayonnaise
- * 1 large egg, lightly beaten
- * 1/4 cup finely chopped fresh parsley
- * 1 teaspoon onion powder
- * 1/2 teaspoon garlic powder
- * 1/4 teaspoon black pepper
- * 1/4 teaspoon salt
- * 1/2 cup all-purpose flour
- * 1 large egg, beaten (for dredging)
- * 1 1/2 cups Panko breadcrumbs
- * 2 tablespoons olive oil, plus more for greasing
Instructions
- Preheat your oven to 400°F (200°C). Line a baking sheet with parchment paper and lightly grease it with olive oil or cooking spray.
- In a medium bowl, combine the well-drained tuna, 1/4 cup mayonnaise, 1 lightly beaten egg, parsley, onion powder, garlic powder, black pepper, and salt. Mix gently until just combined. Avoid overmixing.
- Place the flour, the second beaten egg, and Panko breadcrumbs in three separate shallow dishes.
- Take about 1-2 tablespoons of the tuna mixture and gently form it into a stick shape, approximately 3-4 inches long and 1 inch wide. Repeat with the remaining mixture.
- Dredge each tuna stick first in the flour, shaking off any excess. Then dip it into the beaten egg, allowing any extra to drip off. Finally, roll it in the Panko breadcrumbs, pressing gently to ensure a thorough and even coating.
- Arrange the coated tuna sticks in a single layer on the prepared baking sheet. Drizzle or lightly spray the tops of the sticks with the remaining 2 tablespoons of olive oil.
- Bake for 15-20 minutes, flipping halfway through, until the tuna sticks are golden brown and crispy.
- Serve immediately with your favorite dipping sauce.
Notes
* Ensure the tuna is very well drained to prevent the mixture from being too wet, which can make forming the sticks difficult.
* For extra crispiness, you can lightly toast the Panko breadcrumbs in a dry pan for a few minutes before coating.
* These tuna sticks can be prepared ahead of time and frozen raw after coating. Freeze on a baking sheet until solid, then transfer to an airtight container. Bake from frozen, adding a few extra minutes to the cooking time.
* Serve with a squeeze of fresh lemon juice or a side of sriracha mayonnaise for an added flavor boost.
Nutrition
- Calories: 320
- Fat: 12g
- Carbohydrates: 28g
- Protein: 25g
FAQs
Why is it crucial to drain the tuna thoroughly for this recipe?
Draining the tuna very well is an essential step to achieve the perfect texture for your tuna sticks. If the tuna mixture remains too wet, it becomes challenging to form the sticks properly, and they might not hold their shape during the coating and baking process. Excess moisture can also prevent the Panko breadcrumbs from adhering effectively and can lead to a less crispy result. By ensuring the tuna is well-drained, you create a firm, manageable base that allows for easy shaping and guarantees that satisfyingly crunchy exterior.
What’s the best way to get extra crispy results from these baked tuna fish sticks?
For an elevated level of crispiness, a simple trick is to lightly toast the Panko breadcrumbs before you use them for coating. Simply spread the Panko in a dry pan over medium heat and stir constantly for a few minutes until they turn a light golden color and become fragrant. This pre-toasting step enhances their crunchiness and adds a deeper flavor profile to the finished product. When combined with the olive oil drizzle and the oven’s heat, your tuna sticks will achieve an irresistible, golden-brown crispness.
How long do I need to bake these tuna sticks, and how will I know they’re ready?
These tuna sticks bake quickly in a preheated 400°F (200°C) oven, typically requiring 15 to 20 minutes of cooking time. It is important to flip them halfway through the baking period to ensure even cooking and browning on all sides. You will know they are ready when their exterior is beautifully golden brown and exhibits a distinct crispiness. This visual cue indicates that the Panko coating has perfectly toasted, delivering the delightful texture described in the recipe.
Can I make these tuna sticks in advance and freeze them for later?
Yes, these tuna sticks are excellent for meal prep and can be frozen raw after they have been coated. To do so, arrange the coated sticks in a single layer on a baking sheet and freeze them until they are completely solid. Once frozen, transfer them to an airtight container or a freezer-safe bag, where they can be stored for convenience. When you are ready to cook, simply bake them directly from frozen, remembering to add a few extra minutes to the suggested baking time to ensure they are thoroughly heated and crispy.