
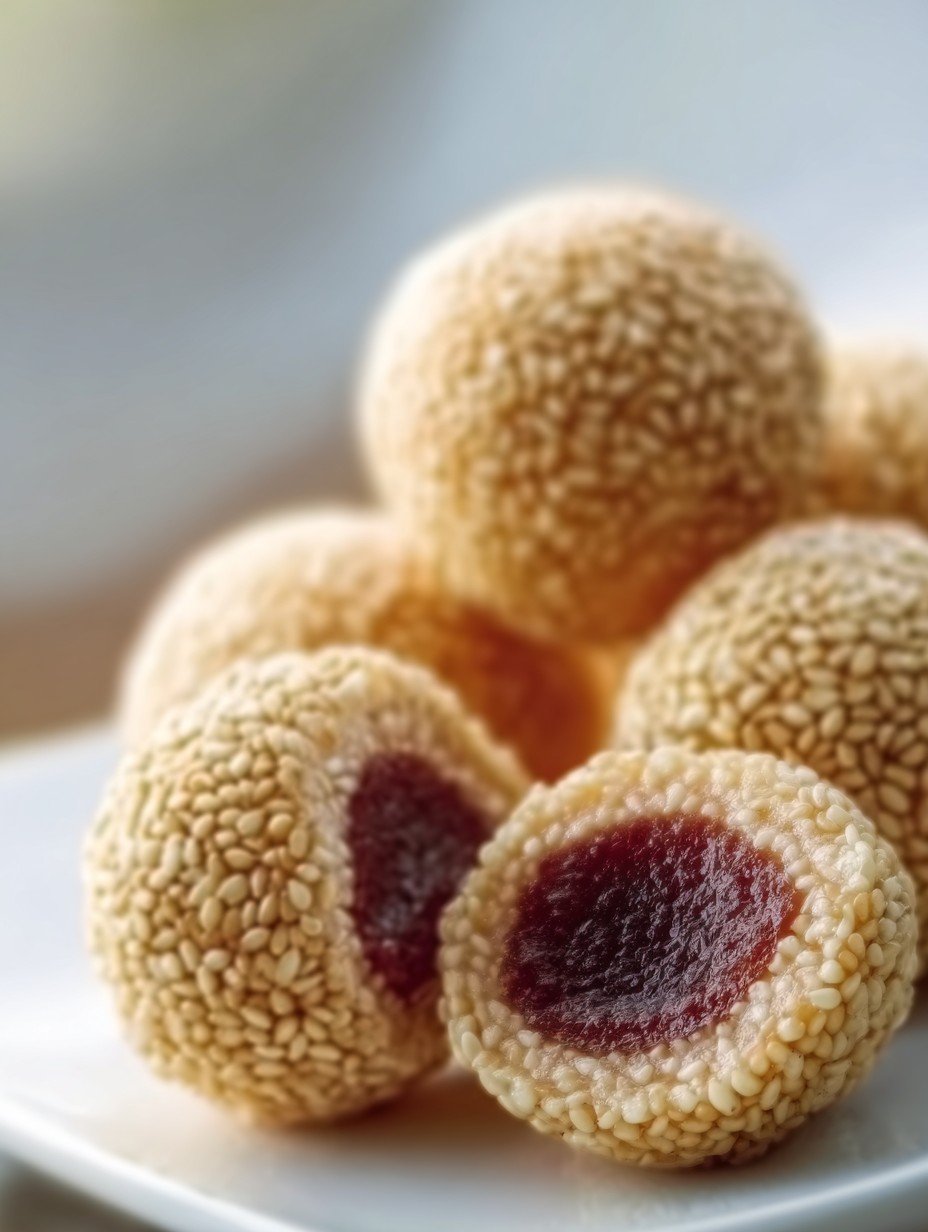
Imagine biting into a golden sphere, the outer shell giving a satisfying crackle, yielding to a delightfully chewy dough that cradles a sweet, smooth red bean filling. These textures and flavors are what pure joy tastes like.
My earliest memories of these treats involve sneaking them from my aunt’s plate at family gatherings, convinced her portions tasted better than mine – a truly universal childhood experience.
What Makes This Recipe Special
This recipe stands out for its straightforward preparation, making it accessible even for novice home cooks, promising delicious results every time. It boasts a unique flavor profile, marrying the nutty aroma of sesame with the comforting sweetness of red bean, offering a delightful twist on traditional desserts. Visually stunning, these golden, sesame-crusted balls bring a touch of elegance to any table, easily customizable with various fillings for endless culinary adventures.
We’ve all been there: staring into the abyss of our refrigerator, pondering what magic we can whip up. Sometimes, you just crave that perfect bite, something with a bit of a crunch, a soft chew, and a sweet surprise inside. This isn’t just a snack; it’s an experience, a golden ticket to a moment of pure bliss that transports you to bustling markets and cozy tea houses. Forget complicated pastries; we’re diving into the delightful world of buchi, those irresistible sesame balls that promise a satisfying crunch with every bite. If you’ve ever wondered how to make crispy buchi sesame balls that rival your favorite takeout, you’re in the right place. Get ready to impress yourself and everyone else with these golden globes of deliciousness!
Ingredients
Here’s what you need for this delicious dish:
- **Glutinous rice flour** This special flour is the secret to the buchi’s signature chewy texture, providing a wonderfully soft and pliable dough that contrasts beautifully with the crispy exterior.
- **Granulated sugar** A touch of sweetness to balance the dough, ensuring every bite is perfectly enjoyable.
- **Hot water** Crucial for hydrating the glutinous rice flour and sugar, helping to form a smooth, workable dough without lumps.
- **White sesame seeds** These tiny powerhouses are key to the “crispy” in “How to Make Crispy Buchi Sesame Balls.” They adhere to the dough, creating a wonderfully textured, crunchy coating when fried.
- **Sweetened red bean paste** The heart of the buchi, this rich and smooth paste provides a comforting, subtly sweet filling that complements the dough and sesame beautifully.
- **Vegetable oil** Essential for deep frying, this oil heats to the perfect temperature to puff up the buchi, transforming them into golden, crispy spheres.
All ingredients and quantities can be found directly in the recipe card below.
Preparing for Buchi Brilliance
Before we dive into the sizzling oil and glorious golden crispiness, let’s talk prep. Think of this as your warm-up act before the main event. Making buchi is less about culinary gymnastics and more about a gentle, rhythmic dance between dough and filling. There’s a certain meditative quality to rolling each ball, sealing in that sweet red bean paste. It’s a moment to slow down, enjoy the process, and anticipate the delicious reward. You might even find yourself humming a little tune as you work, dreaming of that first bite. This isn’t just about how to make crispy buchi sesame balls; it’s about enjoying the journey to snack perfection.
Step-by-Step Instructions
Simply follow these easy steps to prepare this delicious meal:
Step 1: Combine Dry Ingredients and Hydrate
In a large mixing bowl, combine the 1.5 cups (180g) glutinous rice flour and 1/4 cup (50g) granulated sugar. Gradually add 1/2 cup + 2 tablespoons (150ml) hot water, mixing with a spoon or spatula until a shaggy dough forms.
Step 2: Knead the Dough to Perfection
Once cool enough to handle, knead the dough by hand for 5-7 minutes until it becomes smooth, soft, and pliable. It should not be sticky.
Step 3: Portion the Dough
Divide the dough into 12-15 equal pieces. Roll each piece into a small ball.
Step 4: Flatten and Fill
Take one dough ball and flatten it into a disc, about 2-3 inches in diameter. Place about 1 tablespoon of sweetened red bean paste in the center.
Step 5: Seal and Shape
Carefully bring the edges of the dough up and around the filling, pinching them together to seal completely. Roll the filled dough gently between your palms to form a smooth, round ball. Repeat with the remaining dough and filling.
Step 6: Moisten for Adherence
Lightly moisten the surface of each filled ball by rolling it quickly in a shallow bowl of water or brushing with a little water.
Step 7: Apply Sesame Seed Coating
Place 1 cup white sesame seeds in a shallow dish. Roll each moistened ball in the sesame seeds, pressing gently to ensure an even and thorough coating.
Step 8: Heat the Frying Oil
Heat 4-5 cups vegetable oil in a deep pot or wok over medium heat to 325-350°F (160-175°C).
Step 9: Fry Until Golden
Carefully place a few buchi into the hot oil, ensuring not to overcrowd the pot. Fry, turning occasionally with a slotted spoon, until they are golden brown, puffed, and float to the surface, typically 5-7 minutes.
Step 10: Drain Excess Oil
Remove the fried buchi with a slotted spoon and transfer them to a wire rack lined with paper towels to drain any excess oil.
Step 11: Serve and Enjoy
Serve the buchi warm for the best texture and flavor.
Mastering the Crispy Buchi Art: Tips for Success
So, you’ve got the steps down, but let’s talk about the nuances that elevate your buchi from good to legendary. Making truly crispy buchi sesame balls isn’t just about following instructions; it’s about understanding the dough and the oil. Think of yourself as a culinary maestro, conducting the perfect symphony of heat and texture.
First off, that dough consistency is everything. As the note wisely advises, it needs to be soft and pliable. If it’s too dry, it cracks, making sealing a nightmare. Too wet, and it’ll be sticky chaos. Add that hot water sparingly in Step 1, adjusting as needed until you hit that sweet spot. It’s like Goldilocks finding her perfect porridge – not too stiff, not too gooey, but just right for kneading into a dream. Your hands are your best tools here, getting a feel for the dough’s elasticity. This pliable dough is crucial for encapsulating the filling without tears, ensuring a smooth, round ball ready for its crispy destiny.
Secondly, maintaining a consistent oil temperature in Step 8 and 9 is your golden ticket to crispy, evenly cooked buchi. If the oil is too cold, your buchi will become greasy and heavy, refusing to puff up. Too hot, and they’ll burn on the outside before the inside is properly cooked, leading to a doughy, disappointing center. A kitchen thermometer is your best friend here, helping you keep that oil precisely between 325-350°F (160-175°C). Fry in batches to prevent the oil temperature from dropping too drastically, ensuring each batch of buchi gets its moment to shine, puffing up beautifully and achieving that perfect golden hue.
Beyond the Red Bean: Creative Filling Ideas
While the sweetened red bean paste is a classic for a reason, the beauty of these delightful sesame balls lies in their versatility. Think of the red bean as your starting point, but don’t be afraid to venture into new flavor territories. For variety, consider using other sweet fillings that align with the spirit of this wonderful treat. Lotus seed paste offers a rich, slightly nutty alternative, providing a deep, caramelized sweetness that many adore. Another fantastic option is ube jam, which brings a vibrant purple hue and a unique, subtly vanilla-like flavor that is incredibly appealing.
Experimenting with different fillings allows you to tailor your buchi to various tastes and occasions. Just ensure your chosen filling is not too watery, as this can make the dough difficult to seal and potentially burst during frying. A thick, smooth paste is ideal, providing that lovely surprise inside your perfectly crispy shell.
Serving and Storing Your Buchi Treasures
These buchi are truly a treat best enjoyed fresh and warm on the day they are made. The magic of that crisp exterior and chewy interior is at its peak right after draining from the oil. Picture them, still slightly warm, giving way to that soft, sweet filling – pure bliss. They make an excellent dessert or a delightful snack with a cup of tea.
If you happen to have any leftovers (a rare occurrence, in my experience!), store them in an airtight container at room temperature. To revive some of that glorious crispiness the next day, a quick reheat in a toaster oven or air fryer can work wonders. Avoid the microwave, as it tends to make them soft and loses the desired texture. While they won’t be quite as perfect as fresh, a gentle re-crisping can still offer a pleasant experience.
Making buchi might seem intimidating at first glance, but with these clear steps and helpful tips, you’ll be a master of these crispy, chewy, sweet delights in no time. So go ahead, gather your ingredients, clear your counter, and prepare to embark on a delicious journey. Learning how to make crispy buchi sesame balls is a skill that brings joy to both the maker and the eater. Happy frying!
Servings: 12-15 balls
Nutrition (per serving):
Calories: 180 kcal
Protein: 2.5 g
Carbs: 30 g
Fat: 6 g
Improving the Cooking Method
To master making these crispy sesame balls, ensure thorough kneading for a smooth, pliable dough. When filling, seal each buchi completely to prevent bursting. Crucially, maintain your frying oil temperature between 325-350°F and never overcrowd the pot. This allows each ball to puff beautifully, achieving that perfect golden crispness.
Decorate Your Dish with Your Personal Touch
Ready to put your spin on these delightful sesame treats? While the classic sweetened red bean paste is a winner, feel free to swap it out for an equally luscious lotus seed paste or a vibrant ube jam for a pop of color and different flavor. Your buchi, your rules!
Smart Tips for Storage and Reheating
To maintain the irresistible crispness of your buchi, these delectable balls are always best enjoyed immediately after frying. If you have any remaining, store them in an airtight container at room temperature. For reheating, a quick refresh in a toaster oven or air fryer will help restore their delightful exterior crunch.
Practical Chef Advice
I’ll never forget the first time I made these buchi, watching them puff up like little golden treasures. The joy of biting into that warm, chewy, crispy perfection was simply unforgettable and instantly brought a huge smile to my face!
Final Thoughts
After experiencing the joy of preparing these golden, delightful spheres, you’ll understand why they are a beloved treat. The simple process transforms basic ingredients into something truly special: a satisfying crunch from the toasted sesame seeds, a delightfully chewy glutinous rice exterior, and a sweet, smooth red bean filling that melts in your mouth. This recipe for buchi sesame balls delivers a wonderful contrast of textures and flavors. Don’t wait to bring this comforting sweetness to your kitchen. Gather your ingredients and try making them today!
PrintHow to Make Crispy Buchi Sesame Balls
Buchi Sesame Balls are a delightful sweet treat, featuring a crisp exterior coated in toasted sesame seeds that gives way to a wonderfully chewy glutinous rice dough. Inside, a rich and smooth sweetened red bean paste provides a comforting sweetness. These golden spheres are traditionally deep-fried to achieve their characteristic texture and appearance, offering a satisfying contrast of textures and flavors in every bite.
- Prep Time: 30 minutes
- Cook Time: 20 minutes
- Total Time: 50 minutes
- Yield: 12-15 balls 1x
Ingredients
- 1.5 cups (180g) glutinous rice flour
- 1/4 cup (50g) granulated sugar
- 1/2 cup + 2 tablespoons (150ml) hot water, or as needed
- 1 cup white sesame seeds
- 1 cup (250g) sweetened red bean paste
- 4–5 cups vegetable oil, for deep frying
Instructions
- In a large mixing bowl, combine the glutinous rice flour and granulated sugar. Gradually add the hot water, mixing with a spoon or spatula until a shaggy dough forms.
- Once cool enough to handle, knead the dough by hand for 5-7 minutes until it becomes smooth, soft, and pliable. It should not be sticky.
- Divide the dough into 12-15 equal pieces. Roll each piece into a small ball.
- Take one dough ball and flatten it into a disc, about 2-3 inches in diameter. Place about 1 tablespoon of sweetened red bean paste in the center.
- Carefully bring the edges of the dough up and around the filling, pinching them together to seal completely. Roll the filled dough gently between your palms to form a smooth, round ball. Repeat with the remaining dough and filling.
- Lightly moisten the surface of each filled ball by rolling it quickly in a shallow bowl of water or brushing with a little water.
- Place the white sesame seeds in a shallow dish. Roll each moistened ball in the sesame seeds, pressing gently to ensure an even and thorough coating.
- Heat the vegetable oil in a deep pot or wok over medium heat to 325-350°F (160-175°C).
- Carefully place a few buchi into the hot oil, ensuring not to overcrowd the pot. Fry, turning occasionally with a slotted spoon, until they are golden brown, puffed, and float to the surface, typically 5-7 minutes.
- Remove the fried buchi with a slotted spoon and transfer them to a wire rack lined with paper towels to drain any excess oil.
- Serve the buchi warm for the best texture and flavor.
Notes
* The dough consistency is crucial; it should be soft and pliable. Add water sparingly until the desired texture is achieved.
* Maintain a consistent oil temperature during frying to ensure the buchi cook evenly without burning or becoming greasy.
* For variety, consider using other sweet fillings such as lotus seed paste or ube jam.
* Buchi are best enjoyed fresh and warm on the day they are made.
Nutrition
- Calories: 180 kcal
- Fat: 6 g
- Carbohydrates: 30 g
- Protein: 2.5 g
FAQs
How do I ensure the buchi dough is perfect?
Achieving the ideal dough consistency is key for delightful sesame balls. Start by combining 1.5 cups (180g) of glutinous rice flour with 1/4 cup (50g) of granulated sugar. Gradually incorporate 1/2 cup + 2 tablespoons (150ml) of hot water, mixing until a shaggy dough forms. Once it’s cool enough to touch, knead it by hand for 5-7 minutes. The dough should become smooth, soft, and pliable without being sticky. Remember, the hot water is crucial, and adding it sparingly allows you to reach that perfect texture, as consistency can vary slightly.
What is the best way to make sure the sesame seeds stick to the buchi?
To ensure a generous and even coating of white sesame seeds, proper moistening of the dough balls is essential. After filling each ball with about 1 tablespoon of sweetened red bean paste and sealing it, lightly moisten its surface. You can achieve this by quickly rolling the filled ball in a shallow bowl of water or by brushing it with a little water. Immediately after moistening, place the ball in a shallow dish filled with the white sesame seeds. Gently press the seeds onto the ball to create a thorough and consistent coating before frying.
How can I prevent my buchi from becoming greasy during frying?
Preventing greasy buchi primarily involves maintaining the correct oil temperature and not overcrowding the pot. Heat 4-5 cups of vegetable oil in a deep pot or wok to 325-350°F (160-175°C) over medium heat. This temperature range is crucial; if the oil is too cool, the buchi will absorb too much oil, becoming greasy. Carefully place only a few at a time into the hot oil, ensuring they have enough space to fry evenly. Fry them for 5-7 minutes, turning occasionally, until they are golden brown, puffed, and float. Draining them on a wire rack lined with paper towels after frying also helps absorb excess oil.
Can these crispy buchi sesame balls be prepared ahead of time?
For the best texture and flavor, these delightful crispy buchi sesame balls are specifically designed to be enjoyed fresh and warm on the day they are made. While you can prepare the sweetened red bean paste filling in advance, assembling and frying the buchi closer to serving time is highly recommended. The characteristic crispy exterior and chewy interior are at their peak shortly after frying. If left for too long, they may lose their desired crispness and become chewier than intended. Embrace the joy of making and serving them warm!