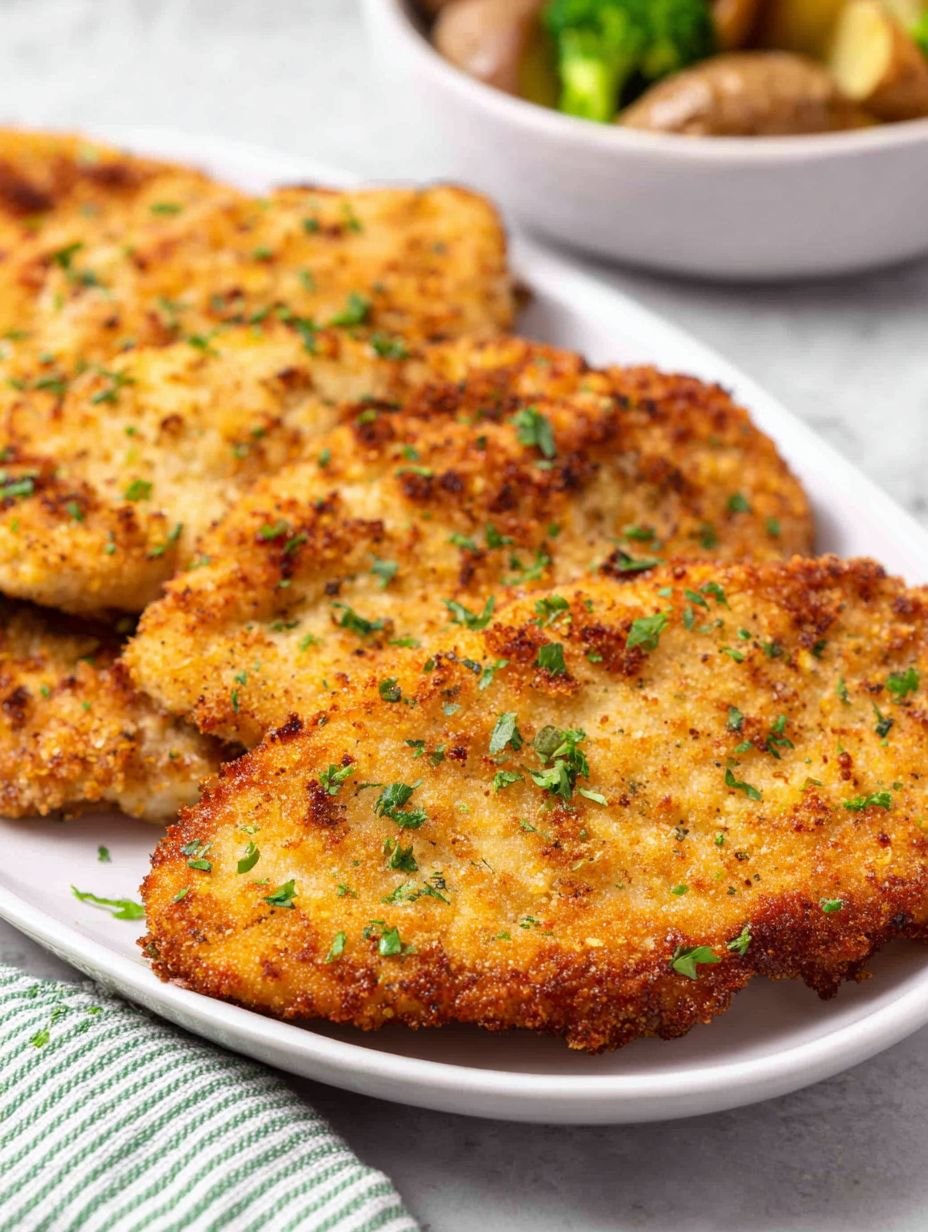
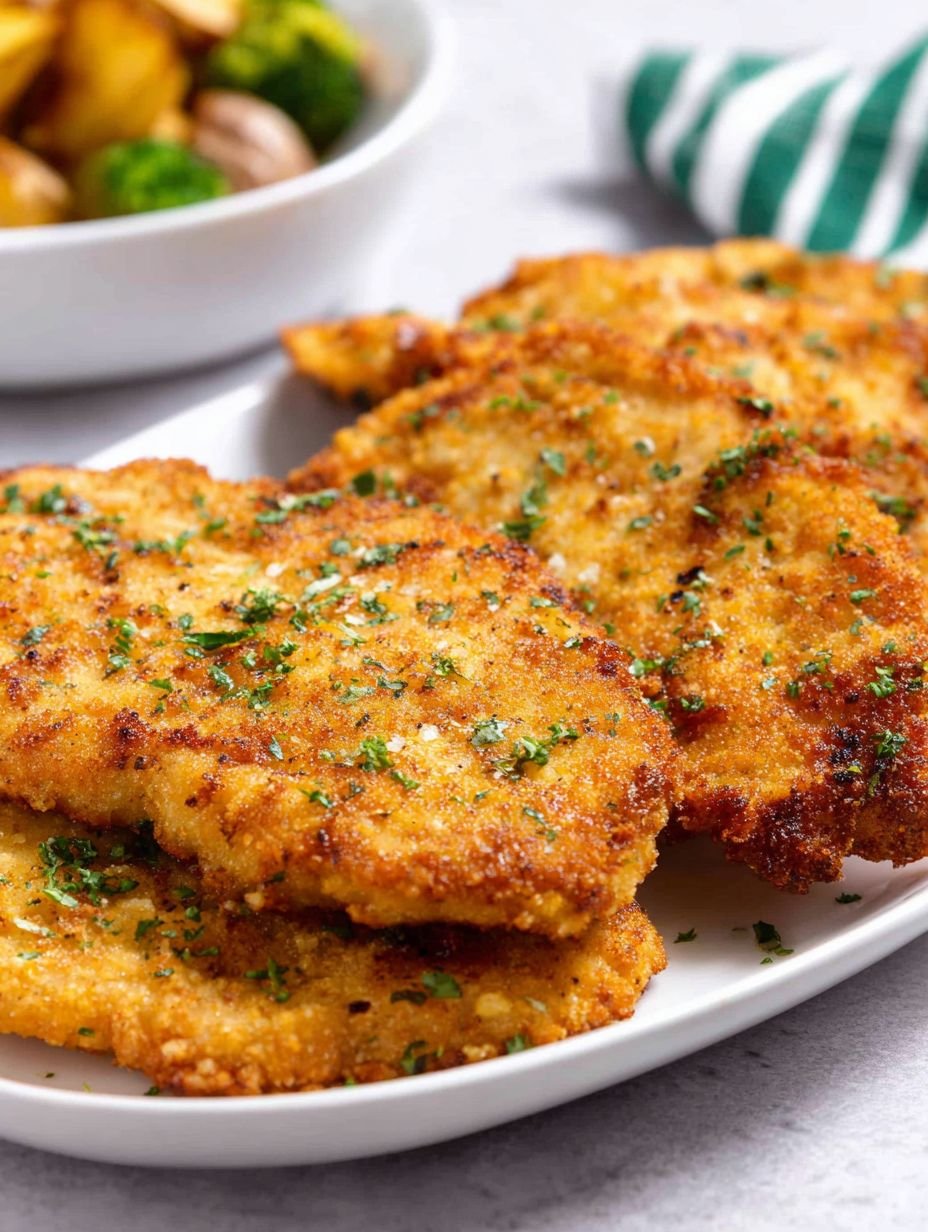
Imagine a symphony of textures: the delightful crunch of a golden crust yielding to unbelievably tender, juicy chicken, all infused with a savory seasoning. This isn’t just a dream; it’s the reality of truly irresistible chicken cutlets.
I remember my early days in the kitchen, attempting to achieve this exact crispiness, often resulting in a smoke alarm serenade or a chicken breast that was more “sad and soggy” than “crispy and delicious.” Those were the days before the air fryer became my culinary superpower!
Why You’ll Love This Recipe
Forget greasy splatters and endless waiting; this recipe for air-fried chicken cutlets is a game-changer. It boasts an incredibly easy preparation process, leveraging the air fryer for maximum efficiency. The unique flavor profile, thanks to a blend of savory spices, perfectly complements the chicken, creating a dish that’s far from bland. Visually, these cutlets emerge with a stunning, uniformly golden-brown exterior that looks like it came straight from a gourmet kitchen. Plus, their versatile nature makes them a fantastic base for countless meal possibilities, easily paired with sides or integrated into sandwiches and salads.
Mastering the Crunch: Essential Prep for Crispy Air Fryer Chicken Cutlets
Achieving that coveted crunch and consistent tenderness isn’t just luck; it’s about understanding a few simple principles. From prepping your chicken with precision to selecting the right breading, each step plays a crucial role in the final, delicious outcome. Get ready to elevate your weeknight meals with these practical insights.
The Foundation: Preparing Your Chicken Just Right
The journey to an amazing chicken cutlet starts even before the breading. Pounding your chicken breasts to an even thickness is the cornerstone of uniform cooking and tenderness. A consistent 1/4-inch thickness ensures that every piece cooks at the same rate, resulting in a perfectly tender interior from edge to edge. This simple step eliminates guesswork and guarantees a juicy result every time.
Ingredients
Here’s what you need for this delicious dish:
- **Boneless, skinless chicken breasts (about 1.5 lbs total)**: We are using four breasts, to be expertly sliced into eight thin cutlets. Preparing them to an even 1/4-inch thickness is vital for uniform cooking and a tender result, ensuring a truly crispy air fryer chicken cutlet.
- **All-purpose flour**: This provides the initial dry layer, acting as a crucial base for the egg wash to adhere to, ensuring your breading sticks beautifully.
- **Garlic powder**: A classic flavor enhancer, garlic powder adds a warm, aromatic depth to the breading, infusing each bite with a savory kick.
- **Onion powder**: Complementing the garlic, onion powder contributes a subtle sweetness and an additional layer of umami to our seasoned flour mixture.
- **Paprika**: Beyond its beautiful reddish hue, paprika offers a mild, slightly sweet, and peppery flavor that enriches the overall spice blend, adding warmth and color.
- **Black pepper**: Freshly ground black pepper delivers a sharp, pungent bite, essential for balancing the other seasonings and adding a touch of warmth.
- **Salt, divided**: This fundamental seasoning is crucial for enhancing all the other flavors, ensuring the chicken itself tastes fantastic. Dividing it ensures both the flour and Panko are perfectly seasoned.
- **Large eggs, lightly beaten**: The egg wash acts as the “glue,” creating a moist surface that allows the Panko breadcrumbs to adhere securely to the chicken cutlets.
- **Panko breadcrumbs**: This is the MVP for achieving that incredible crispiness. Panko breadcrumbs are larger and flakier than regular breadcrumbs, absorbing less oil and creating an exceptionally light and crunchy coating that defines these crispy chicken cutlets.
- **Fresh parsley, chopped (for garnish, optional)**: A sprinkle of fresh parsley adds a vibrant burst of color and a subtle, fresh herbaceous note, perfect for presentation.
- **Olive oil spray**: Essential for promoting a gorgeous golden-brown color and enhancing the crispiness of the Panko breadcrumbs during air frying, ensuring a satisfying crunch without excessive oil.
Step-by-Step Instructions
Follow these simple steps to prepare this delicious dish:
Step 1: Prepare the chicken
If your chicken breasts are thick, slice them horizontally to create thinner cutlets. Place each cutlet between two pieces of plastic wrap and pound gently with a meat mallet or rolling pin until about 1/4-inch thick. This ensures every piece cooks evenly and remains wonderfully tender.
Step 2: Set up breading stations
In a shallow dish, combine the flour, garlic powder, onion powder, paprika, black pepper, and 1/4 teaspoon of salt. Stir these dry ingredients together thoroughly. In a second shallow dish, whisk the two large eggs until lightly beaten. In a third shallow dish, place the Panko breadcrumbs and the remaining 1/4 teaspoon of salt, mixing them well.
Step 3: Bread the chicken
Dredge each chicken cutlet first in the seasoned flour, shaking off any excess gently. Then, dip it into the lightly beaten egg, allowing any extra egg to drip off naturally. Finally, press the cutlet firmly into the Panko breadcrumbs, ensuring it is fully coated on all sides for maximum crispiness.
Step 4: Preheat Air Fryer
Preheat your air fryer to a precise 375°F (190°C) for a full 5 minutes. This crucial preheating step ensures the air fryer is at the optimal temperature to immediately start crisping the breading.
Step 5: Air Fry the chicken
Lightly spray the air fryer basket with olive oil spray. Place 2-3 breaded chicken cutlets in a single layer in the basket, being careful to ensure they do not overlap. Lightly spray the tops of the chicken cutlets with olive oil spray to promote golden-brown perfection.
Step 6: Cook to crispy perfection
Air fry for 8-12 minutes, flipping halfway through the cooking time. Continue until the chicken is beautifully golden brown, wonderfully crispy, and cooked through to an internal temperature of 165°F (74°C). Remember that cooking time may vary slightly depending on the thickness of your cutlets and your specific air fryer model.
Step 7: Repeat the process
Remove the perfectly cooked cutlets from the air fryer. Repeat steps 5 and 6 with the remaining chicken, making sure to spray the basket and cutlets with olive oil spray as needed for each new batch. This ensures every piece achieves the same delicious crispiness.
Step 8: Serve immediately
Garnish with fresh chopped parsley, if desired, to add a touch of color and freshness, and serve these delightful cutlets immediately to enjoy their ultimate crispy texture and juicy interior.
Tips for Crispy Air Fryer Chicken Cutlets
Achieving truly spectacular results with your air fryer chicken cutlets involves a few key techniques. These small adjustments can make a significant difference in the final texture and flavor. Let’s explore how to maximize the crisp factor and ensure every cutlet is a masterpiece of tender juiciness.
Pound with Purpose
Pounding your chicken to about 1/4-inch thickness ensures consistent cooking, preventing dry edges and guaranteeing a uniformly tender result. This crucial step eliminates guesswork.
The Panko Power Play
For that unrivaled crunch, firmly press the Panko breadcrumbs onto the chicken. The more securely the Panko adheres, the better it will hold up during air frying, creating a robust and satisfyingly crisp coating for these tasty chicken cutlets.
Don’t Crowd the Party
Do not overcrowd the air fryer basket. Cooking in batches allows for proper air circulation, essential for uniform crisping. If the basket is too full, the chicken will steam instead of fry, leading to a less crispy result.
A Spritz of Golden Goodness
A light spray of olive oil on the breaded cutlets before air frying helps achieve a beautiful, rich golden-brown color and significantly enhances the crisp texture. This quick step boosts visual and textural appeal.
The Art of Resting
Allow the chicken to rest for a few minutes after cooking. This allows juices to redistribute, resulting in a much juicier, more flavorful, and tender chicken experience. It’s a small pause for a big payoff.
Frequently Asked Questions
Why is preheating important?
Preheating your air fryer to 375°F (190°C) for 5 minutes is crucial. This immediate high heat helps the breading crisp up quickly and prevents the chicken from drying out, locking in juices and achieving that desirable golden-brown exterior.
Can I prepare breaded cutlets ahead of time?
For the best crispiness, air fry immediately after breading. If you must prep ahead, bread them and place on a wire rack in the refrigerator for up to 30 minutes to help prevent sogginess.
What are good side dishes?
These versatile chicken cutlets pair wonderfully with a fresh garden salad, roasted vegetables, mashed potatoes, or rice pilaf. A squeeze of fresh lemon juice with steamed green beans is also delightful.
How do I store and reheat leftovers?
Store leftovers in an airtight container in the refrigerator for up to 3-4 days. To reheat and maintain crispiness, place them back in the air fryer at 350°F (175°C) for 5-7 minutes. Avoid the microwave.
Recipe Summary: Your Delicious Meal Awaits
So there you have it, a foolproof guide on how to make crispy air fryer chicken cutlets that will impress anyone lucky enough to get a bite. Gone are the days of guessing and hoping for a crispy outcome; with these steps and tips, you’re guaranteed success. This dish offers a fantastic way to enjoy tender chicken with a satisfying crunch, all cooked efficiently and with minimal fuss.
With a prep time that’s surprisingly quick and a cooking method that’s hands-off, it’s perfect for busy weeknights or when you simply crave something delicious without the usual culinary acrobatics. These golden, crunchy cutlets are a testament to the power of the air fryer and a testament to simple, flavorful cooking.
**Servings: ** 4
**Nutrition Information per serving: **
- Calories: 320
- Protein: 38g
- Carbs: 25g
- Fat: 7g
Enjoy crafting these amazing crispy air fryer chicken cutlets, and prepare for a standing ovation from your taste buds! It truly is a simple way to elevate your home cooking game, delivering restaurant-quality flavor and texture right in your own kitchen.
Perfecting the Cooking Process
For truly crispy air fryer chicken cutlets, consistency is key. Pound your chicken to an even 1/4-inch thickness for uniform cooking. Ensure each piece is thoroughly coated in Panko breadcrumbs for that ultimate crunch. Preheat your air fryer fully and avoid overcrowding the basket to guarantee even crisping on every golden-brown bite.
Add Your Personal Touch
To customize your crispy chicken cutlets, consider swapping regular paprika in the flour mixture for smoked paprika. For the garnish, use fresh chives or cilantro instead of parsley. You can also mix dried Italian herbs into the Panko breadcrumbs for an extra aromatic layer of deliciousness on these delightful air fryer chicken cutlets.
Storage & Reheating
To preserve the irresistible crunch of your chicken cutlets, allow them to cool completely. Store them in an airtight container in the refrigerator for up to 3 days. For best results, reheat in the air fryer at 350°F (175°C) for 5-7 minutes until hot and re-crisped.
Helpful Chef Tips
These golden cutlets remind me of the time my nephew, who usually avoids chicken, devoured three in one sitting! His “more crunch, please!” quickly became our family’s highest compliment for crispy air fryer chicken cutlets.
Final Thoughts
You’ve just unlocked the secret to perfectly golden, unbelievably crispy chicken cutlets, straight from your air fryer. Imagine that satisfying crunch giving way to tender, juicy chicken, all infused with savory seasonings. This recipe delivers a delightful meal that’s both quick to prepare and incredibly flavorful, making it a new weeknight favorite. Forget the fuss and embrace the ease of preparing these delightful cutlets. Ready to bring that irresistible crispiness and incredible taste to your dinner table tonight? Go ahead, give this simple yet sensational method a try and savor every delicious bite!
PrintHow to Make Crispy Air Fryer Chicken Cutlets

These chicken cutlets are prepared to achieve a beautifully golden and crispy exterior, encasing a tender and juicy interior. Cooked efficiently in the air fryer, they offer a satisfying crunch with a savory, seasoned breading, making for a delightful and straightforward meal.
- Prep Time: 20 minutes
- Cook Time: 20-25 minutes
- Total Time: 0 hours
- Yield: 4 1x
Ingredients
- 4 boneless, skinless chicken breasts (about 1.5 lbs total), cut into 8 thin cutlets
- 1/2 cup all-purpose flour
- 1 teaspoon garlic powder
- 1/2 teaspoon onion powder
- 1/2 teaspoon paprika
- 1/4 teaspoon black pepper
- 1/2 teaspoon salt, divided
- 2 large eggs, lightly beaten
- 1 1/2 cups Panko breadcrumbs
- 2 tablespoons fresh parsley, chopped (for garnish, optional)
- Olive oil spray
Instructions
- Prepare the chicken: If your chicken breasts are thick, slice them horizontally to create thinner cutlets. Place each cutlet between two pieces of plastic wrap and pound gently with a meat mallet or rolling pin until about 1/4-inch thick.
- Set up breading stations: In a shallow dish, combine the flour, garlic powder, onion powder, paprika, black pepper, and 1/4 teaspoon of salt. In a second shallow dish, whisk the eggs. In a third shallow dish, place the Panko breadcrumbs and the remaining 1/4 teaspoon of salt.
- Bread the chicken: Dredge each chicken cutlet first in the seasoned flour, shaking off any excess. Then dip it into the beaten egg, allowing any extra to drip off. Finally, press the cutlet firmly into the Panko breadcrumbs, ensuring it is fully coated on all sides.
- Preheat Air Fryer: Preheat your air fryer to 375°F (190°C) for 5 minutes.
- Air Fry the chicken: Lightly spray the air fryer basket with olive oil spray. Place 2-3 breaded chicken cutlets in a single layer in the basket, ensuring they do not overlap. Lightly spray the tops of the chicken cutlets with olive oil spray.
- Cook: Air fry for 8-12 minutes, flipping halfway through, until the chicken is golden brown, crispy, and cooked through to an internal temperature of 165°F (74°C). Cooking time may vary depending on the thickness of the cutlets and your air fryer model.
- Repeat: Remove cooked cutlets and repeat with the remaining chicken, spraying the basket and cutlets as needed for each batch.
- Serve: Garnish with fresh chopped parsley, if desired, and serve immediately.
Notes
Pound chicken cutlets to an even thickness for uniform cooking and tenderness.
For extra crispiness, ensure the Panko breadcrumbs are firmly pressed onto the chicken.
Do not overcrowd the air fryer basket; cook in batches to allow for proper air circulation and crisping.
A light spray of olive oil on the breaded cutlets before air frying helps achieve a beautiful golden-brown color and crisp texture.
Allow the chicken to rest for a few minutes after cooking to retain its juices.
Nutrition
- Calories: 320
- Fat: 7g
- Carbohydrates: 25g
- Protein: 38g
FAQs
Why is it important to pound the chicken cutlets thin?
Pounding the chicken cutlets to an even 1/4-inch thickness, as guided in the first step, is crucial for several reasons. Firstly, it ensures that all pieces cook uniformly, preventing some parts from being undercooked while others are dry. This even cooking leads to a consistently tender result. Secondly, this method tenderizes the chicken, breaking down muscle fibers for a more succulent result. Finally, thinner cutlets cook much faster in the air fryer, contributing to the efficient preparation of these crispy chicken cutlets. This simple preparation step makes a big difference in the final texture and cooking consistency.
How can I ensure my chicken cutlets become perfectly crispy?
Achieving that desirable crispy exterior, a hallmark of these delightful chicken cutlets, relies on a few key steps outlined in the recipe. Firstly, firmly pressing the Panko breadcrumbs onto each cutlet, as specified in step 3, creates a robust coating that crisps beautifully. Panko is known for its light, airy texture that lends itself well to crunch. Secondly, remember to lightly spray both the air fryer basket and the tops of the breaded chicken with olive oil spray before cooking, as detailed in step 5. This helps achieve a beautiful golden-brown color and irresistible crisp texture without excessive oil. Lastly, do not overcrowd the basket; cooking in batches ensures optimal air circulation for maximum crunch.
What is the recommended air fryer temperature and cooking time for these cutlets?
For these chicken cutlets, the recipe recommends preheating your air fryer to 375°F (190°C) for 5 minutes before adding the chicken. This initial preheating helps ensure an even cooking temperature from the start. Once placed in the basket, the cutlets are air fried for 8-12 minutes, with a crucial flip halfway through the cooking process. This two-sided cooking ensures both sides become golden and crispy. Always verify doneness by checking that the chicken reaches an internal temperature of 165°F (74°C). Keep in mind that exact cooking times can vary slightly depending on the thickness of your specific cutlets and the model of your air fryer.
Why does the recipe call for three separate breading stations?
The three-station breading process, involving flour, beaten egg, and Panko breadcrumbs, is fundamental to creating the signature crispy coating on these air fryer chicken cutlets. The initial dredge in seasoned flour helps to absorb any surface moisture from the chicken and provides a dry surface for the egg to adhere to, ensuring the subsequent layers stick properly. The whisked egg then acts as a binder, creating a sticky layer that allows the Panko breadcrumbs to cling effectively. Finally, the Panko breadcrumbs are essential for achieving that beautifully golden and satisfyingly crispy exterior, contributing significantly to the texture and flavor of the final dish.