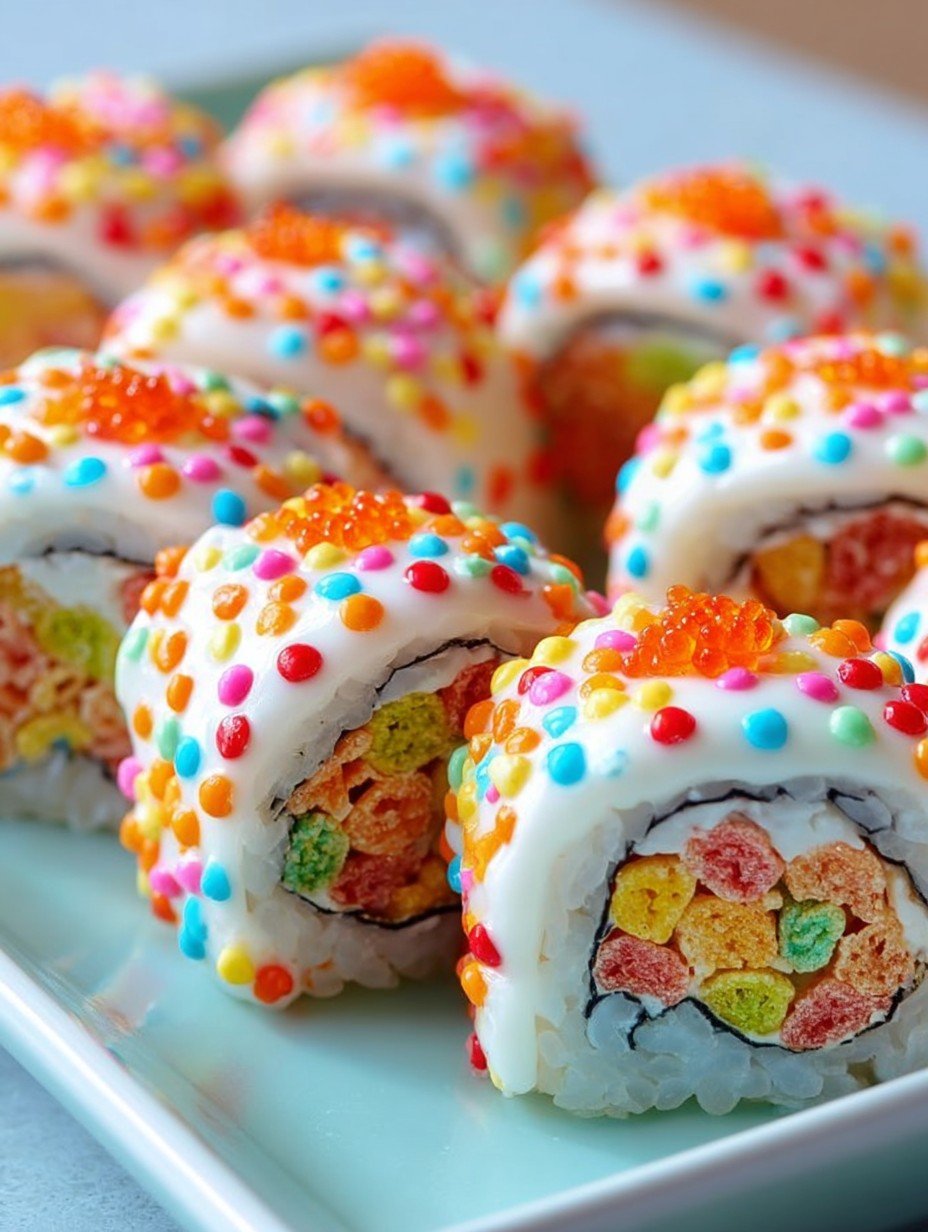
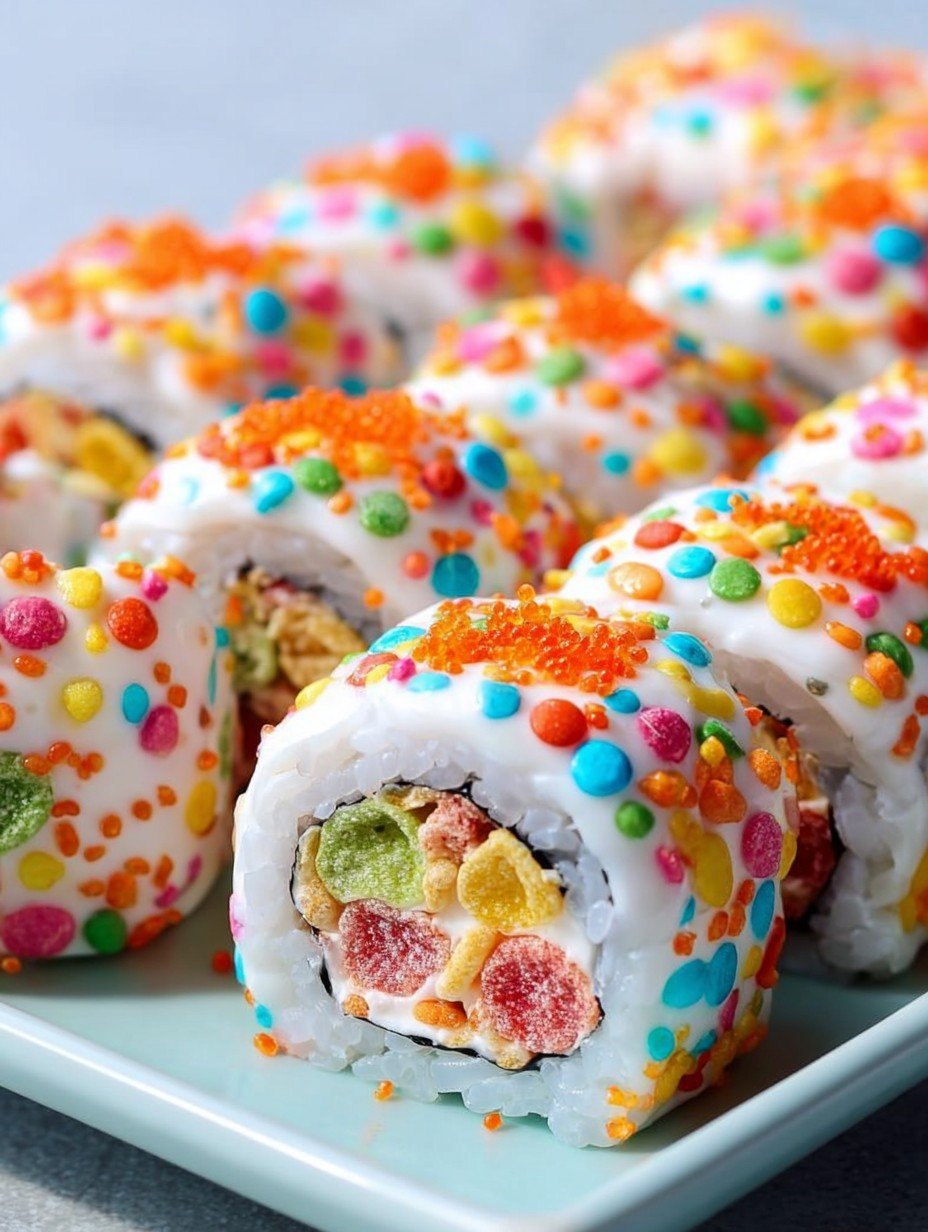
Imagine the perfect blend of crunchy, sweet cereal, creamy frosting, and soft rice, all wrapped into a vibrant, bite-sized package. It’s a dessert that’s as delightful to look at as it is to eat.
I remember the first time I whipped these up for a friend’s party; everyone paused, blinked, then burst into laughter and “Wait, is that sushi?!” before devouring them whole. It was a hilarious hit!
Reasons Why You’ll Love This Recipe
This recipe is an absolute winner for its effortless preparation, transforming simple pantry staples into an extraordinary treat. It boasts a truly unique flavor profile, marrying the nostalgic crunch of breakfast cereal with the subtle sweetness of dessert rice and creamy frosting, creating a playful sensation. Visually, these rolls are stunning, a true kaleidoscope of colors that instantly brightens any dessert spread. Plus, their versatility allows for easy customization with various sprinkles and candies, making each batch a fresh, exciting creation perfect for any gathering or a whimsical indulgence.
Ingredients for Your Sweet Sushi Adventure
Here’s what you need for this delicious dish:
- **Uncooked sushi rice** Choose a high-quality short-grain sushi rice, essential for its sticky texture which holds these delightful rolls together.
- **Water** The precise amount of water is crucial for cooking the rice to that perfect, tender yet firm consistency.
- **Granulated sugar** This sweetens the sushi rice itself, adding a fundamental layer of the “sweet” in your Fruity Pebbles Sushi Rolls.
- **Rice vinegar** A subtle tangy note from the rice vinegar balances the sweetness, making the overall flavor profile more complex and authentic to sushi rice.
- **Salt** Just a pinch of salt enhances all the other flavors, making the sweet and fruity notes pop even more.
- **Nori seaweed (or rice paper for a softer bite)** These sheets are the wrappers for your rolls, providing either a traditional seaweed taste and texture or a milder, chewier alternative.
- **Fruity Pebbles cereal** The star of our “colorful treat” and the primary source of delightful crunch and a vibrant, fruity burst in the center of each roll.
- **Cream cheese, softened** Essential for creating the incredibly smooth and creamy frosting that tops these sweet rolls, ensuring it blends effortlessly.
- **Powdered sugar** This finely ground sugar gives the frosting its perfect sweetness and silky smooth texture without any graininess, contributing to the “sweet” aspect.
- **Milk or cream** A small amount helps achieve the ideal consistency for your frosting, making it easily spreadable over the rolls.
- **Vanilla extract** A touch of vanilla adds a warm, aromatic depth to the creamy frosting, elevating its overall flavor.
- **Colorful sprinkles** These little bursts of edible joy are key to the “colorful treat” aspect, adding a festive visual appeal and a slight textural variation to the finished rolls.
- **Orange candy pearls (or small orange candies)** Providing another layer of visual delight and a fun, slightly firmer crunch, these specific candies further amplify the “colorful” and “treat” elements of your rolls.
All ingredients with their exact quantities can be found in the recipe card below.
Crafting Your Fruity Pebbles Sushi Rolls: Step-by-Step Guide
Here’s a simple guide to help you prepare this delicious recipe:
Getting Started: Rice Prep & Flavor Infusion
The foundation of any great sushi, even the sweet kind, begins with perfectly prepared rice. Patience and precision in this initial stage ensure your Fruity Pebbles Sushi Rolls will hold their shape and deliver the desired texture.
**Step 1: Rinse the Rice Thoroughly**
Rinse the sushi rice thoroughly under cold water until the water runs clear. Drain well. This critical step removes excess starch, which is essential for achieving distinct, non-gummy rice grains.
**Step 2: Cook the Sushi Rice to Perfection**
Combine the rinsed rice and 1 1/4 cups water in a medium saucepan. Bring to a boil, then reduce heat to low, cover, and simmer for 15 minutes, or until all water is absorbed. Remove from heat and let stand, covered, for another 10 minutes. Allowing the rice to steam off the heat ensures it becomes perfectly fluffy and ready for flavoring.
**Step 3: Prepare the Sweet Vinegar Mixture**
In a small bowl, whisk together the 2 tablespoons granulated sugar, 1 tablespoon rice vinegar, and 1/4 teaspoon salt until the sugar dissolves. This simple concoction is what gives sushi rice its characteristic sweet and tangy undertone.
**Step 4: Flavor and Cool the Rice**
Transfer the cooked rice to a large, non-metallic bowl. Gently fold in the sugar-vinegar mixture, being careful not to mash the rice. Let the rice cool to room temperature. This cooling process is crucial for the rice to become easier to handle and for the flavors to meld beautifully.
Assembling Your Colorful Masterpiece
Now comes the fun part: bringing together all the elements to create your vibrant Fruity Pebbles Sushi Rolls. This stage is where the magic truly happens, transforming simple ingredients into an eye-catching dessert.
**Step 5: Whip Up the Creamy Frosting**
In another bowl, beat the 1/2 cup softened cream cheese, 1/4 cup powdered sugar, 1 tablespoon milk or cream, and 1 teaspoon vanilla extract until smooth and creamy. This will be your “frosting.” Ensure the cream cheese is softened to avoid lumps and achieve a silky consistency.
**Step 6: Layer Rice onto Nori**
Lay a sheet of nori on a bamboo sushi mat. Spread a thin, even layer of cooled sushi rice over the nori, leaving about a 1-inch border at the top edge. The bamboo mat will assist in creating a tight, professional-looking roll.
**Step 7: Add the Fruity Pebbles Core**
Arrange a generous line of 3 cups Fruity Pebbles cereal horizontally across the center of the rice. This forms the crunchy, colorful heart of your sweet sushi rolls.
**Step 8: Roll the Sushi Tightly**
Using the bamboo mat, carefully roll the sushi tightly from the bottom edge upwards, pressing gently to seal. Moisten the top border of the nori with a little water to help it stick. A tight roll is key to keeping everything together.
**Step 9: Repeat the Rolling Process**
Repeat with the remaining nori, rice, and cereal. You’ll soon have a collection of unadorned, yet promising, sweet sushi logs.
The Finishing Touches and Chilling Out
The final steps are all about decorating and preparing your Fruity Pebbles Sushi Rolls for their grand reveal. These embellishments are what truly make this dessert a “sweet & colorful treat.”
**Step 10: Frost Your Rolls**
Once all rolls are formed, spread a thin layer of the cream cheese frosting over the top of each roll. This creamy topping provides a smooth canvas for the vibrant decorations to follow.
**Step 11: Decorate with Sprinkles and Pearls**
Generously sprinkle the 1/4 cup colorful sprinkles and 2 tablespoons orange candy pearls over the frosted rolls. This step truly brings the “colorful” aspect of the Fruity Pebbles Sushi Rolls to life, making them incredibly appealing.
**Step 12: Chill for Firmness**
Chill the rolls in the refrigerator for at least 30 minutes to allow them to firm up. Chilling is essential for easier, cleaner slicing and helps the frosting set.
**Step 13: Slice and Serve Your Sweet Sushi**
To serve, use a sharp, damp knife to slice each roll into 6-8 pieces. Garnish with a few extra sprinkles if you like, and serve immediately to enjoy the fantastic textures and flavors.
Sweet Sushi Success: Tips, Tricks, and Variations
Making these Fruity Pebbles Sushi Rolls is a joyful culinary experience, and a few insider tips can make it even smoother. Achieving clean slices and keeping your rolls intact is easier than you might think with these simple pointers.
Recipe Notes for Perfection
For easier slicing, lightly dampen your knife with water between cuts to prevent sticking. This trick makes a huge difference in presentation, giving you neat, appealing pieces. Chilling the rolls thoroughly before slicing helps maintain their shape and makes for cleaner cuts, so resist the urge to slice too early! Adjust the sweetness of the rice to your preference by adding more or less sugar to the vinegar mixture; some like it sweeter, some prefer a more subtle balance. Furthermore, for a delightful twist, experiment with other colorful cereals or candy toppings for different variations. Imagine chocolate cereals or different colored candy pieces to match a theme! This adaptability makes Fruity Pebbles Sushi Rolls a fantastic base for creativity.
Frequently Asked Questions About Dessert Sushi
**Q: Can I make Fruity Pebbles Sushi Rolls ahead of time?**
A: Absolutely! You can prepare the rice and frosting a day in advance, storing them separately in the refrigerator. Assemble the rolls closer to serving time for the best texture, as the cereal can soften over time. Once assembled, they can be chilled for up to a few hours before serving.
**Q: What if I don’t have a bamboo sushi mat?**
A: No sushi mat? No problem! You can use a sheet of plastic wrap or parchment paper as a substitute. Just lay your nori on it, spread the rice, add the cereal, and use the plastic wrap or parchment paper to help you roll tightly. It might take a little practice, but it’s totally achievable.
**Q: Can I use different types of cereal?**
A: Yes, definitely! The recipe encourages experimentation. While Fruity Pebbles are fantastic for their “colorful treat” aspect, feel free to try other sweet, crunchy cereals like Trix, Cap’n Crunch, or even Cinnamon Toast Crunch for a different flavor profile. The key is to pick something with a good crunch and flavor that complements the sweet rice and frosting.
**Q: How do I store leftover Fruity Pebbles Sushi Rolls?**
A: If you happen to have any leftovers (which is unlikely!), store them in an airtight container in the refrigerator for up to 1-2 days. Keep in mind that the cereal might lose some of its crispness over time, but the rolls will still be delicious.
Nutrition Facts for Your Sweet Treat
Understanding the nutritional breakdown of your dessert can be helpful, especially when planning for special occasions or just satisfying your sweet tooth.
**Servings: ** This recipe yields 4-6 servings, which typically translates to 2-3 rolls per serving, making it perfect for sharing or a decadent individual treat.
**Per serving: **
- Calories: 320
- Protein: 5g
- Carbs: 65g
- Fat: 6g
These Fruity Pebbles Sushi Rolls offer a delightful balance of sweet carbohydrates and a modest amount of protein and fat, making them a satisfying and fun dessert option.
These Fruity Pebbles Sushi Rolls are more than just a dessert; they are a celebration of fun, flavor, and vibrant colors. Whether you’re making them for a party, a whimsical family dinner, or just to brighten your own day, this recipe promises smiles and satisfied taste buds. So go ahead, embrace your inner dessert artist, and roll up some joy! Your taste buds (and your Instagram feed) will thank you.
Perfecting the Cooking Process
While your sushi rice simmers and then rests, seize the opportunity to whisk together your sugar-vinegar mixture and prepare the creamy “frosting.” This smart sequencing ensures all components are ready when your rice has cooled, making the assembly of your Fruity Pebbles Sushi Rolls: A Sweet & Colorful Treat a breeze.
Add Your Personal Touch
Prefer a softer wrap? Opt for rice paper instead of nori seaweed. Adjust your “frosting” richness by using either milk or cream. Get creative with colorful sprinkles, perhaps matching a theme, and swap the orange candy pearls for other small, vibrant candies, making these sweet dessert rolls truly your own.
Storage & Reheating
Store your completed Fruity Pebbles sushi rolls in an airtight container in the refrigerator for up to two days. To best preserve the cereal’s crunch and firm shape, enjoy them chilled within 24 hours. Reheating is not advised; these sweet and colorful treats are truly best enjoyed cold.
Helpful Chef Tips
I once served these vibrant Fruity Pebbles sushi rolls at a brunch, and the sheer delight on everyone’s faces was priceless. It was an instant hit, sparking conversations and smiles, a truly sweet and colorful memory!
Final Thoughts
These Fruity Pebbles Sushi Rolls: A Sweet & Colorful Treat truly deliver on their promise of a playful, vibrant dessert experience. From the delightful crunch of the cereal to the creamy frosting and the burst of color from sprinkles and candy pearls, every bite is a joyful adventure for your taste buds. This unique twist on sushi is not only visually stunning, making it a guaranteed showstopper at any gathering, but also surprisingly simple to assemble. It’s the perfect way to bring a smile to faces and inject a bit of whimsy into your day. Don’t just imagine the fun; gather your ingredients and whip up a batch of these extraordinary sweet rolls today!
PrintFruity Pebbles Sushi Rolls: A Sweet & Colorful Treat

This playful dessert sushi offers a vibrant and whimsical twist on a classic form. Each roll features a core of colorful Fruity Pebbles cereal, providing a delightful crunch and a burst of sweet, fruity flavor. This is encased in a layer of subtly sweet sushi rice, then topped with a smooth, creamy white frosting. The rolls are generously adorned with an assortment of bright, multi-colored sprinkles and small, glistening orange candy pearls, adding both visual appeal and a varied texture. The combination creates a unique sweet treat that is both visually striking and enjoyable to eat.
- Prep Time: 45 minutes
- Cook Time: 15 minutes
- Total Time: 1 hour
- Yield: 4-6 (2-3 rolls) 1x
Ingredients
- 1 cup uncooked sushi rice
- 1 1/4 cups water
- 2 tablespoons granulated sugar
- 1 tablespoon rice vinegar
- 1/4 teaspoon salt
- 4 sheets nori seaweed (or rice paper for a softer bite)
- 3 cups Fruity Pebbles cereal
- 1/2 cup cream cheese, softened
- 1/4 cup powdered sugar
- 1 tablespoon milk or cream
- 1 teaspoon vanilla extract
- 1/4 cup colorful sprinkles
- 2 tablespoons orange candy pearls (or small orange candies)
Instructions
- Rinse the sushi rice thoroughly under cold water until the water runs clear. Drain well.
- Combine the rinsed rice and water in a medium saucepan. Bring to a boil, then reduce heat to low, cover, and simmer for 15 minutes, or until all water is absorbed. Remove from heat and let stand, covered, for another 10 minutes.
- In a small bowl, whisk together the granulated sugar, rice vinegar, and salt until the sugar dissolves.
- Transfer the cooked rice to a large, non-metallic bowl. Gently fold in the sugar-vinegar mixture, being careful not to mash the rice. Let the rice cool to room temperature.
- In another bowl, beat the softened cream cheese, powdered sugar, milk or cream, and vanilla extract until smooth and creamy. This will be your "frosting."
- Lay a sheet of nori on a bamboo sushi mat. Spread a thin, even layer of cooled sushi rice over the nori, leaving about a 1-inch border at the top edge.
- Arrange a generous line of Fruity Pebbles cereal horizontally across the center of the rice.
- Using the bamboo mat, carefully roll the sushi tightly from the bottom edge upwards, pressing gently to seal. Moisten the top border of the nori with a little water to help it stick.
- Repeat with the remaining nori, rice, and cereal.
- Once all rolls are formed, spread a thin layer of the cream cheese frosting over the top of each roll.
- Generously sprinkle the colorful sprinkles and orange candy pearls over the frosted rolls.
- Chill the rolls in the refrigerator for at least 30 minutes to allow them to firm up.
- To serve, use a sharp, damp knife to slice each roll into 6-8 pieces.
Notes
For easier slicing, lightly dampen your knife with water between cuts to prevent sticking.
Chilling the rolls thoroughly before slicing helps maintain their shape and makes for cleaner cuts.
Adjust the sweetness of the rice to your preference by adding more or less sugar to the vinegar mixture.
Experiment with other colorful cereals or candy toppings for different variations.
Nutrition
- Calories: 320 per serving
- Fat: 6g
- Carbohydrates: 65g
- Protein: 5g
FAQs
How do I prepare the sushi rice correctly for these sweet rolls?
Achieving the right rice texture is key for your sweet sushi. First, rinse the uncooked sushi rice thoroughly under cold water until it runs clear, then drain it well. Combine the rinsed rice with water in a saucepan, bring to a boil, then reduce heat, cover, and simmer for 15 minutes until absorbed. Crucially, let it stand, covered, for another 10 minutes off the heat. After transferring to a non-metallic bowl, gently fold in the mixture of granulated sugar, rice vinegar, and salt, ensuring the sugar fully dissolves. Let the rice cool completely to room temperature before spreading it.
What’s the best way to ensure my cream cheese frosting is smooth and creamy?
For a perfectly smooth and creamy frosting, it’s essential to start with softened cream cheese. In a separate bowl, combine the softened cream cheese with powdered sugar, milk or cream, and vanilla extract. Use a beater to mix these ingredients until the mixture is light, fluffy, and completely free of lumps. If your cream cheese isn’t soft enough, it might result in a slightly lumpy texture, so allowing it to come to room temperature beforehand is a crucial step for achieving that desired silky consistency.
Can I use rice paper instead of nori seaweed, and how do I roll them effectively?
Yes, the recipe suggests using either nori seaweed or rice paper, offering rice paper for a softer bite. Regardless of your choice, lay your selected sheet on a bamboo sushi mat. Spread a thin, even layer of the cooled sushi rice, leaving about a 1-inch border at the top edge. Arrange the Fruity Pebbles cereal horizontally across the center. To roll, use the bamboo mat to guide a tight, even roll from the bottom edge upwards, pressing gently. Don’t forget to moisten the top border with a little water; this helps the roll stick together and seal properly.
Why is chilling important, and what’s the best technique for slicing these dessert rolls?
Chilling the rolls for at least 30 minutes in the refrigerator is a crucial step that allows them to firm up properly. This firmness is essential for maintaining their distinct shape and achieving clean, precise cuts. When it’s time to slice, retrieve the chilled rolls and use a sharp knife. For the cleanest possible slices and to prevent the sweet, sticky rice from adhering to the blade, lightly dampen your knife with water between each cut. This simple trick ensures your Fruity Pebbles dessert sushi looks as delightful as it tastes.