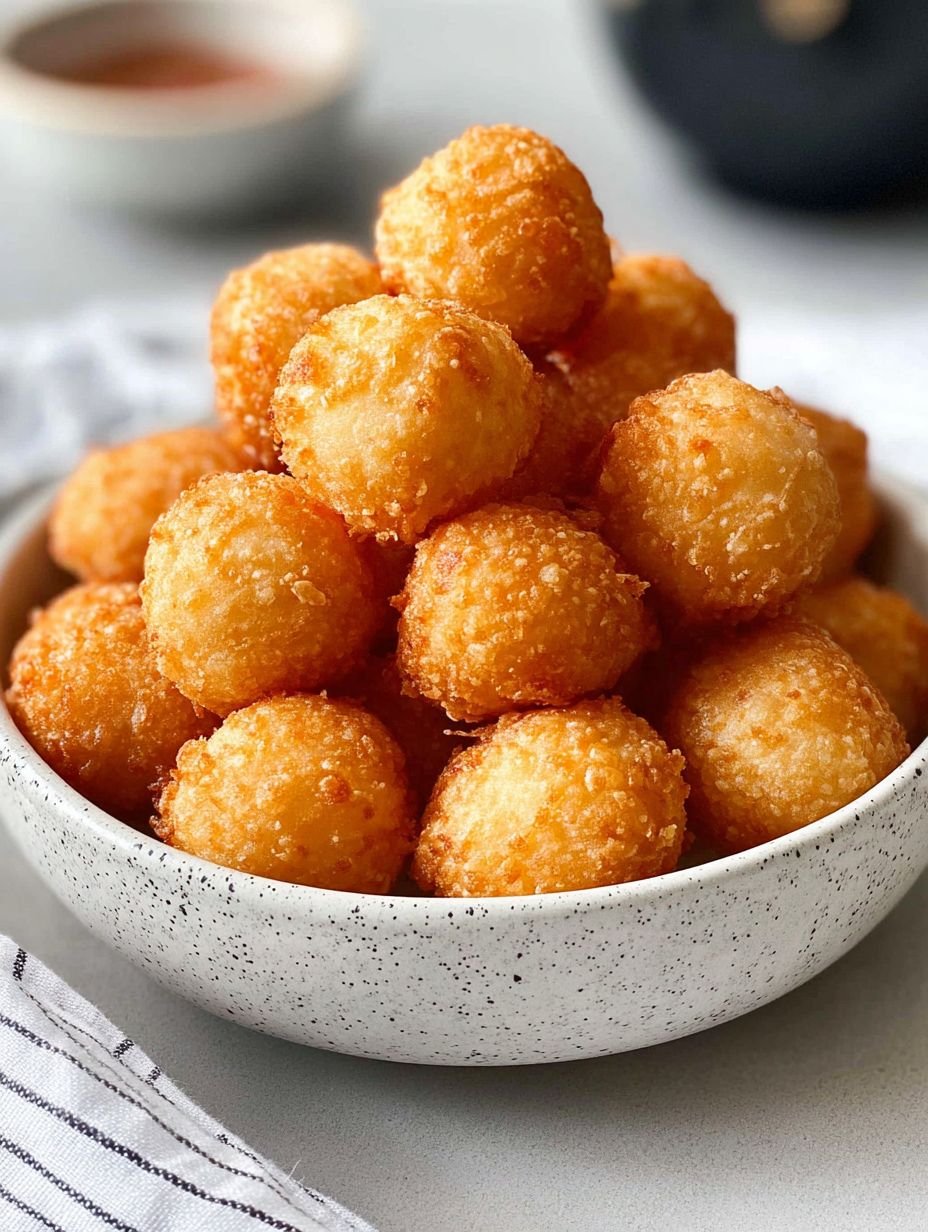
Imagine a bite that delivers an irresistible crunch, followed by tender, juicy chicken, all enveloped in a sunny, golden embrace. This is the magic of a perfectly crafted, ultimate crispy golden snack ball. My own culinary journey with these delightful spheres began with a kitchen resembling a flour explosion, but the heavenly taste of that first successful batch made every messy moment worth it.
Why You’ll Love This Recipe
This recipe for crispy golden chicken balls isn’t just easy to follow; it promises a unique flavor profile that perfectly balances savory chicken with a tangy, sweet and sour sauce. Their stunning golden appearance will impress any guest, making them a fantastic appetizer or a fun main course for a family dinner. Plus, the accompanying sauce is incredibly versatile, letting you adapt its sweetness or tang to your preference, truly making it your own ultimate crispy golden snack ball experience. These delightful bites offer both ease and impressive results.
Ingredients
Here’s what you need for this delicious dish:
- **For the Chicken Balls:**
- **Boneless, skinless chicken breast or thigh, cut into 1-inch pieces:** The heart of our snack ball, ensuring each bite is succulent and full of flavor. Thigh meat offers more moisture and richness, while breast is leaner; choose your preference, just ensure the pieces are uniform for even cooking.
- **Salt (1 teaspoon):** Essential for seasoning the chicken from within, drawing out its natural deliciousness and preparing it for its golden transformation.
- **White pepper (1/2 teaspoon):** A subtle, earthy spice that complements the chicken beautifully without overpowering its natural taste, adding a gentle warmth.
- **Light soy sauce (1 tablespoon):** Adds a fantastic umami depth and a touch of savory richness to the chicken marinade, laying a flavorful foundation.
- **Sesame oil (1 teaspoon):** Imparts a beautiful nutty aroma and a distinctive, rich flavor, a hallmark of many delicious Asian-inspired dishes and crucial for the chicken’s initial seasoning.
- **All-purpose flour (1 cup):** The essential foundation of our batter, working in harmony with cornstarch to create that wonderfully light and crispy exterior.
- **Cornstarch (1/2 cup):** The absolute secret weapon for achieving maximum crispiness! This ingredient is key to ensuring our snack balls develop their signature satisfying crunch and contributes significantly to the ultimate crispy golden snack ball texture.
- **Baking powder (1 teaspoon):** A clever addition that helps the batter puff up and become delightfully airy, contributing to a lighter, more delicate crunch when fried.
- **Salt (1/2 teaspoon):** Seasons the batter itself, so every part of the snack ball, from the chicken to the crust, is perfectly flavorful.
- **Cold water (approximate 1 cup):** Crucial for creating a smooth, thick batter. Using cold water helps to minimize gluten development, which results in a tender chicken interior and that truly crispy golden crust we’re all aiming for.
- **Vegetable oil, for deep frying:** The golden medium for transforming our battered chicken into those irresistible, perfectly golden, crispy nuggets, ensuring a beautiful, even cook.
- **For the Sweet and Sour Sauce:**
- **Pineapple juice (1/2 cup):** Provides the delightful fruity sweetness and tangy notes that are the defining characteristics of a classic sweet and sour sauce.
- **Rice vinegar (1/4 cup):** Adds a bright, clean acidity that expertly balances the sweetness, creating that delightful, palate-cleansing pucker.
- **Granulated sugar (1/4 cup):** The primary sweetness component, which harmonizes with the tang from the vinegar and pineapple, creating a perfectly balanced flavor profile.
- **Ketchup (2 tablespoons):** Contributes a rich tomato base, a vibrant color, and a unique savory-sweet depth that gives the sauce its familiar, comforting taste.
- **Light soy sauce (1 tablespoon):** Enhances the savory notes and overall umami of the sauce, adding another layer of complex flavor to our sweet and sour masterpiece.
- **Grated fresh ginger (1 teaspoon):** Infuses a warm, zesty, and aromatic kick, providing a fresh brightness that cuts through the richness of the fried chicken.
- **Minced garlic (1 clove):** Provides a pungent, savory base note that rounds out the sauce’s flavor profile, adding depth and a gentle bite.
- **Cornstarch (1 tablespoon) & Cold water (2 tablespoons):** Whisked together to form a smooth slurry, this combination is absolutely essential for thickening the sauce to a perfect, glossy, and clingy consistency.
- **Optional: Diced red bell pepper, diced green bell pepper, diced onion (1/4 cup each):** These colorful additions bring a gentle crunch, extra natural sweetness, and vibrant visual appeal to the sweet and sour sauce, making it even more enticing.
The complete ingredient list, including quantities, can be found directly under the recipe card.
Step-by-Step Instructions
Follow these simple steps to prepare this delicious dish:
Marinate Your Chicken for Maximum Flavor
This first step is absolutely crucial for infusing flavor deep into every piece of chicken, ensuring your ultimate crispy golden snack ball is delicious from the very first bite to the last. In a medium bowl, combine your perfectly cut 1-inch chicken pieces with 1 teaspoon of salt, 1/2 teaspoon of white pepper, 1 tablespoon of light soy sauce, and 1 teaspoon of sesame oil. Give everything a really good mix, ensuring each piece of chicken is thoroughly coated with the aromatic marinade. Now, let it sit and marinate for at least 15 minutes to allow all those wonderful flavors to absorb. If you happen to have a bit more time on your hands, pop it into the refrigerator for up to 30 minutes. This little rest makes a remarkably significant difference in the final, savory taste.
Craft the Perfect Crispy Batter
Now for the magic that makes these snack balls truly golden and wonderfully crispy! In a separate, generously sized bowl, whisk together the dry ingredients for your batter: 1 cup of all-purpose flour, 1/2 cup of cornstarch, 1 teaspoon of baking powder, and 1/2 teaspoon of salt. Once these are well combined, gradually add approximately 1 cup of cold water to the dry mixture, whisking continuously and patiently. You are aiming for a smooth, thick batter that has a consistency similar to a classic pancake batter – it should be thick enough to cling beautifully to the chicken pieces without being overly gloopy or runny. Don’t hesitate to adjust the cold water amount slightly until you achieve that perfect consistency. This carefully crafted batter is the fundamental secret to getting that perfect, crispy golden exterior we’re all aiming for in our ultimate crispy golden snack ball.
Whip Up Your Tangy Sweet and Sour Sauce
No crispy golden snack ball is truly complete without its perfectly balanced, tangy, and sweet companion sauce. In a small saucepan, combine 1/2 cup of pineapple juice, 1/4 cup of rice vinegar, 1/4 cup of granulated sugar, 2 tablespoons of ketchup, 1 tablespoon of light soy sauce, 1 teaspoon of grated fresh ginger, and 1 minced clove of garlic. Bring this delightful mixture to a gentle simmer over medium heat, stirring patiently and consistently until all the granulated sugar has completely dissolved, creating a smooth base. In a tiny separate bowl, whisk together 1 tablespoon of cornstarch with 2 tablespoons of cold water to create a smooth, lump-free slurry. Now, pour this cornstarch slurry into your simmering sauce, whisking vigorously and constantly. Watch in amazement as the sauce magically thickens right before your eyes! If you’re choosing to add them, now is the ideal time to stir in your optional 1/4 cup of diced red bell pepper, 1/4 cup of diced green bell pepper, and 1/4 cup of diced onion. Let these vibrant vegetables cook for another 2-3 minutes until they are slightly softened but still retain a pleasant, gentle bite. Remove the saucepan from the heat once it has reached your desired, glossy thickness.
Achieve Golden Perfection: Frying the Snack Balls
It’s showtime! This is the exhilarating moment where your ultimate crispy golden snack ball truly comes to life. Grab a large, deep pot or a sturdy Dutch oven and pour in enough vegetable oil for deep frying; ensure there is enough oil for the chicken balls to be fully submerged. Heat the oil to precisely 350°F (175°C). Seriously, a kitchen thermometer is your absolute best friend here to maintain that critical temperature! Carefully dip each marinated chicken piece into the prepared batter, ensuring it’s completely coated with that wonderful, thick mixture. Gently lower the battered chicken pieces into the hot oil, being incredibly mindful not to overcrowd the pot. Fry them in sensible batches to maintain the oil temperature and ensure both even cooking and optimal crispiness. Let them fry for 5-7 minutes, or until they turn a beautiful, enticing golden brown and are thoroughly cooked through. For safety and peace of mind, the internal temperature of the chicken should reach 165°F (74°C). Using a slotted spoon, gracefully lift the cooked golden snack balls from the oil and place them on a wire rack, set over a baking sheet, to efficiently drain away any excess oil. Repeat this delightful process with the remaining chicken until every piece is a crispy, golden masterpiece.
Serve Your Golden Culinary Creation
The moment you’ve been eagerly waiting for has arrived! Serve your piping hot Chinese Chicken Balls immediately after they come out of the fryer. The crispiness and warmth are absolutely at their peak right now. Present them artfully alongside the warm, tangy Sweet and Sour Sauce, perfect for dipping and dredging. You can even garnish with a sprinkle of fresh chopped scallions or a simple parsley sprig for a cheerful pop of color and freshness. Then, step back and watch them disappear as everyone enjoys this incredible ultimate crispy golden snack ball experience!
Perfecting the Cooking Process
For the ultimate crispy golden snack, start marinating the chicken. While it rests, prepare the sweet and sour sauce. Then, mix your batter. Frying the chicken balls in small batches ensures consistent oil temperature and perfectly golden results every time.
Add Your Personal Touch
Customize these golden snack balls! For the sauce, swap pineapple juice for orange juice to alter the fruity tang. Adjust the red bell pepper, green bell pepper, and onion proportions, or use only one variety to focus its flavor.
Storage & Reheating
To preserve crunch, store golden chicken balls separately from the sweet and sour sauce. Keep fried balls in an airtight container, refrigerating for longer. Reheat in an oven or air fryer for crispiness. Warm the sauce gently before serving.
Helpful Chef Tips
My nephew, usually a picky eater, devoured these golden delights at a family gathering. He proclaimed them “better than restaurant quality!” It was truly a heartwarming win.
Final Thoughts
There’s nothing quite like biting into a perfectly crafted snack ball – that satisfying crunch giving way to tender, succulent chicken. This recipe for The Ultimate Crispy Golden Snack Ball Recipe delivers exactly that: an irresistible texture and flavor combination that’s sure to impress. Paired with the vibrant, tangy sweet and sour sauce, each bite is a journey of delightful contrasts. Don’t just dream about that golden perfection; gather your ingredients and make this truly rewarding dish a reality in your kitchen. Your taste buds will thank you!
PrintThe Ultimate Crispy Golden Snack Ball Recipe

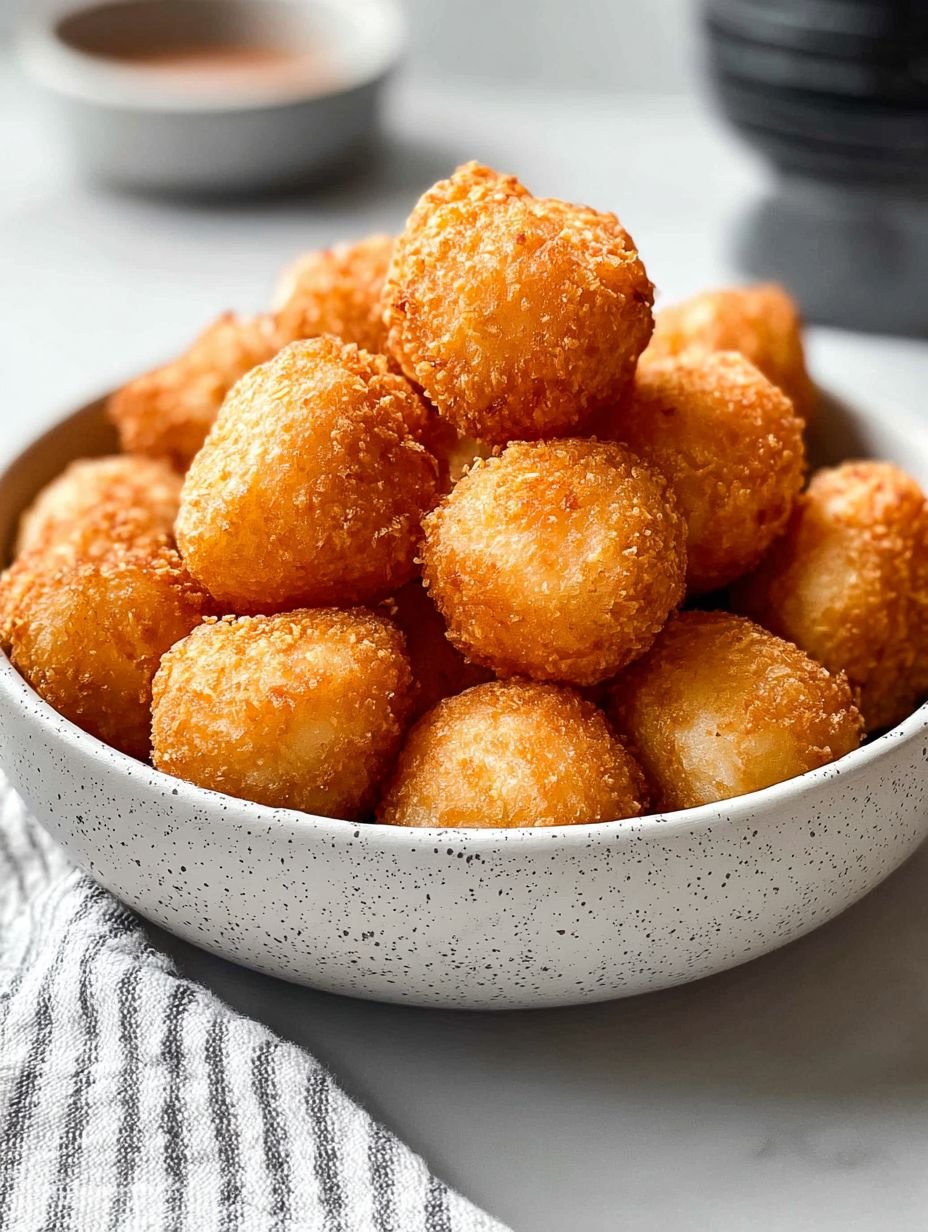
These golden-fried chicken balls offer a delightful contrast of textures, featuring a crisp, airy batter encasing tender pieces of seasoned chicken. Each bite delivers a satisfying crunch followed by succulent poultry. Traditionally served with a vibrant sweet and sour sauce, the dish balances savory notes with a tangy, fruity sweetness, creating a harmonious flavor profile. The chicken balls are deep-fried to achieve their signature golden hue and irresistible texture.
- Prep Time: 25 minutes
- Cook Time: 20 minutes
- Total Time: 45 minutes
- Yield: 4 1x
Ingredients
- **For the Chicken Balls:**
- 500g boneless, skinless chicken breast or thigh, cut into 1-inch pieces
- 1 teaspoon salt
- 1/2 teaspoon white pepper
- 1 tablespoon light soy sauce
- 1 teaspoon sesame oil
- 1 cup all-purpose flour
- 1/2 cup cornstarch
- 1 teaspoon baking powder
- 1/2 teaspoon salt
- 1 cup cold water (approximate)
- Vegetable oil, for deep frying
- **For the Sweet and Sour Sauce:**
- 1/2 cup pineapple juice
- 1/4 cup rice vinegar
- 1/4 cup granulated sugar
- 2 tablespoons ketchup
- 1 tablespoon light soy sauce
- 1 teaspoon grated fresh ginger
- 1 clove garlic, minced
- 1 tablespoon cornstarch
- 2 tablespoons cold water
- Optional: 1/4 cup diced red bell pepper, 1/4 cup diced green bell pepper, 1/4 cup diced onion
Instructions
- **1. Prepare the Chicken:**
- In a medium bowl, combine the chicken pieces with 1 teaspoon salt, white pepper, 1 tablespoon light soy sauce, and sesame oil. Mix well and let marinate for at least 15 minutes, or up to 30 minutes in the refrigerator.
- **2. Make the Batter:**
- In a separate large bowl, whisk together the all-purpose flour, cornstarch, baking powder, and 1/2 teaspoon salt. Gradually add the cold water to the dry ingredients, whisking until a smooth, thick batter forms. The consistency should be similar to pancake batter, thick enough to coat the chicken without being too runny. Adjust water as needed.
- **3. Prepare the Sweet and Sour Sauce:**
- In a small saucepan, combine pineapple juice, rice vinegar, sugar, ketchup, 1 tablespoon light soy sauce, ginger, and garlic. Bring to a simmer over medium heat, stirring until the sugar dissolves. In a small bowl, whisk together 1 tablespoon cornstarch and 2 tablespoons cold water to create a slurry. Pour the cornstarch slurry into the simmering sauce, whisking constantly until the sauce thickens. If using, add diced bell peppers and onion and cook for another 2-3 minutes until slightly softened. Remove from heat.
- **4. Fry the Chicken Balls:**
- Heat vegetable oil in a large deep pot or Dutch oven to 350°F (175°C). Ensure there is enough oil for the chicken balls to be fully submerged. Dip each marinated chicken piece into the batter, ensuring it is fully coated. Carefully lower the battered chicken pieces into the hot oil, frying in batches to avoid overcrowding the pot. Fry for 5-7 minutes, or until golden brown and cooked through. The internal temperature of the chicken should reach 165°F (74°C). Using a slotted spoon, remove the cooked chicken balls and place them on a wire rack set over a baking sheet to drain excess oil. Repeat with the remaining chicken.
- **5. Serve:**
- Serve the hot Chinese Chicken Balls immediately with the warm Sweet and Sour Sauce on the side for dipping.
Notes
Maintain oil temperature between 325-350°F (160-175°C) for best results; use a kitchen thermometer.
Do not overcrowd the pot when frying; this ensures even cooking and crispiness.
For an extra crispy texture, you can double-fry the chicken balls: fry once until lightly golden, remove, let cool slightly, then fry again at 375°F (190°C) for 1-2 minutes until deeply golden.
The sweet and sour sauce can be made ahead of time and reheated gently before serving.
Nutrition
- Calories: 550
- Fat: 20g
- Carbohydrates: 60g
- Protein: 35g
FAQs
What type of chicken should I use for these crispy snack balls?
For these delicious snack balls, the recipe specifically calls for 500g of boneless, skinless chicken breast or thigh, cut into 1-inch pieces. Both options work wonderfully, providing tender, juicy meat encased in the crispy batter. Using either breast or thigh ensures the chicken cooks through nicely within the specified frying time, remaining succulent on the inside while the exterior achieves its signature golden crunch. Be sure to cut the pieces uniformly to promote even cooking throughout the batch.
How do I ensure my chicken balls are extra crispy?
Achieving that desirable extra crispiness is key for this snack. First, ensure your oil temperature is consistently maintained between 325-350°F (160-175°C) using a kitchen thermometer. Avoid overcrowding the pot when frying, as this can lower the oil temperature and result in less crispy chicken. For an even more profound crunch, consider double-frying: fry once until lightly golden, remove and let cool slightly, then fry again at 375°F (190°C) for 1-2 minutes until deeply golden and extra crunchy.
Can I prepare the sweet and sour sauce in advance?
Absolutely! The sweet and sour sauce is an excellent component to prepare ahead of time, which can help streamline your cooking process on the day you plan to fry the chicken. Once made, allow the sauce to cool completely, then store it in an airtight container in the refrigerator. When you’re ready to serve, simply reheat the sauce gently over low to medium heat, stirring occasionally, until it reaches your desired warmth and consistency.
What is the recommended oil temperature for frying these chicken pieces?
Maintaining the correct oil temperature is crucial for the success of these golden bites. The recipe specifies heating vegetable oil in a large deep pot or Dutch oven to 350°F (175°C). It’s highly recommended to use a kitchen thermometer to monitor the oil temperature accurately. As you add batches of battered chicken, the temperature may drop slightly, so strive to keep it between 325-350°F (160-175°C) for optimal cooking and to achieve that perfect golden-brown, crispy exterior without burning.