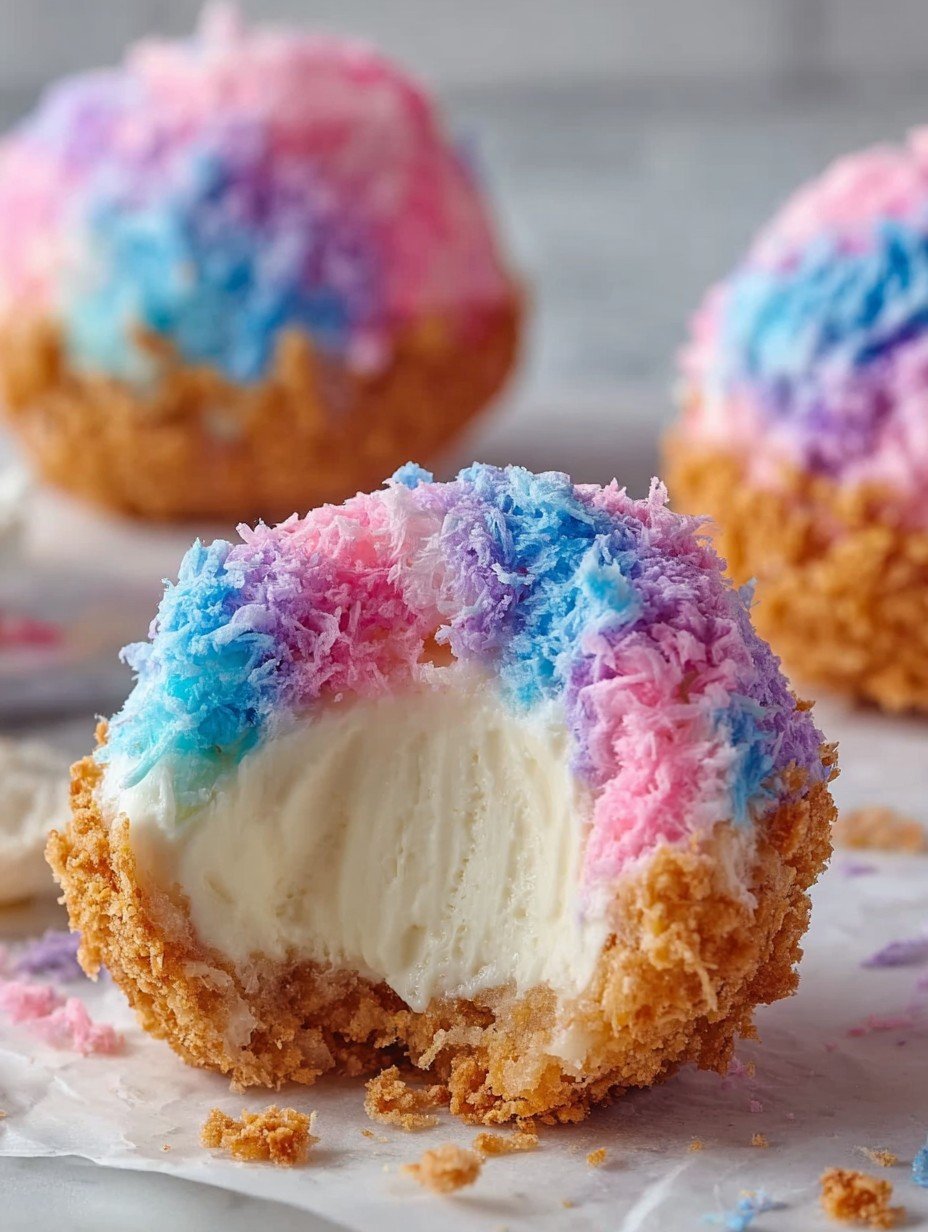
Imagine a burst of creamy, sweet cheesecake, perfectly encased in a golden, crunchy shell, all crowned with a whimsical cloud of fluffy, multi-colored sweetness. It’s a symphony of textures and flavors that will make your taste buds sing and your eyes widen in delight.
My earliest memory of a truly magical dessert involved a street fair and a surprisingly elegant treat that somehow tasted like pure joy. It sparked a lifelong quest to recreate that sense of playful indulgence, leading me down a delicious path to these delightful bites.
What Makes This Recipe Special
These dessert bombs are truly a marvel, offering effortless preparation that belies their show-stopping appeal. They boast a uniquely vibrant flavor profile, marrying rich cheesecake with a playful, sweet coconut finish, creating an unforgettable experience. Visually, their stunning appearance, reminiscent of fluffy carnival confections, makes them an instant centerpiece. Beyond their charm, these treats are wonderfully versatile; perfect for parties, an indulgent snack, or even a personalized gift for those who appreciate a touch of sweet magic.
Gather Your Whimsical Ingredients
Here’s what you need for this delicious dish:
- **Cream cheese, softened** For the lusciously smooth filling, ensure your cream cheese is brought to room temperature before mixing. This prevents lumps and ensures a perfectly creamy base for your cheesecake.
- **Granulated sugar** Essential for sweetening the rich cheesecake filling, balancing the tanginess of the cream cheese with delightful sweetness.
- **Large egg yolk** This acts as a binder, helping the cheesecake filling set beautifully and contributing to its rich, smooth texture.
- **Vanilla extract** A classic flavor enhancer, a good quality vanilla extract will deepen the overall sweetness and aromatic profile of the cheesecake filling.
- **All-purpose flour** Part of our crucial breading station, the flour provides the first layer of coating, helping the egg wash adhere effectively to the frozen cheesecake balls.
- **Large egg, beaten** Whisked with milk, this forms the essential egg wash, a sticky bridge that allows the panko breadcrumbs to create that sought-after crispy exterior.
- **Milk** Combined with the egg, it creates the perfect consistency for the egg wash, ensuring an even and thorough coating for each cheesecake bomb.
- **Panko breadcrumbs** These Japanese-style breadcrumbs are the secret to the incredibly crispy exterior of these delightful treats. Their light, airy texture becomes wonderfully golden and crunchy when fried.
- **Shredded coconut, sweetened** This forms the vibrant, fluffy, and sweet topping that gives these dessert bombs their signature cotton candy appearance and flavor. Sweetened coconut holds color beautifully.
- **Pink food coloring** Used to dye a portion of the shredded coconut, adding one of the iconic, playful hues of cotton candy to the topping.
- **Blue food coloring** Another essential tint for the coconut, contributing to the charming, multi-colored visual appeal that mimics carnival cotton candy.
- **Purple food coloring** Completes the trio of vibrant colors for the topping, creating a truly eye-catching and fun presentation for each dessert bomb.
- **Cotton candy flavoring extract (Optional)** For an extra punch of carnival sweetness, a few drops of this extract can intensify the cotton candy experience in these delightful crispy treats.
- **Vegetable oil, or enough for deep frying** Crucial for achieving that perfectly golden-brown, irresistibly crispy coating on your cheesecake bombs. Ensure you have enough to submerge them safely.
All ingredients and quantities can be found directly in the recipe card below.
Crafting Your Dessert Bombs: The Steps
Simply follow these easy steps to prepare this delicious meal:
Step 1: Whip Up Your Dreamy Cheesecake Filling
Grab a medium-sized bowl and combine your softened cream cheese with the granulated sugar. Beat them together until the mixture is wonderfully smooth and creamy, without any lumps in sight. Next, gently stir in the egg yolk and the vanilla extract. Be careful not to overmix at this stage; just combine until everything is perfectly incorporated for your luscious filling.
Step 2: Shape and Freeze for Future Crispness
Scoop your prepared cheesecake mixture into small, uniform balls, aiming for about 1.5 tablespoons each. Precision here helps with even cooking! Arrange these delicate balls on a parchment-lined baking sheet. This step is absolutely critical: place them in the freezer for a minimum of 2-3 hours, or until they are completely solid. This rock-solid freezing is what prevents them from melting prematurely when they hit the hot oil.
Step 3: Set Up Your Expert Breading Station
Prepare your workspace by setting out three shallow dishes. In the first dish, pour your all-purpose flour. In the second, whisk the large egg together with the milk; this creates your essential egg wash. Finally, in the third dish, spread out your panko breadcrumbs. This organized setup will make the coating process quick and tidy.
Step 4: Double Coat for Ultimate Crunch
Now for the magic coating! Work with one frozen cheesecake ball at a time to maintain its cold temperature. First, roll it thoroughly in the flour, making sure to shake off any excess. Next, dip it completely into the egg wash, ensuring every surface is covered. Finally, roll it generously in the panko breadcrumbs, gently pressing to create a thick, even, and complete coating. Return the coated balls to the freezer for at least 30 minutes. This second chill time is key for the coating to adhere perfectly and stay intact during frying.
Step 5: Fry Until Golden and Crispy
Heat your vegetable oil in a deep pot or Dutch oven until it reaches exactly 350°F (175°C). Temperature control is important for achieving a crisp texture without overcooking the inside. Carefully lower just 2-3 cheesecake bombs into the hot oil at a time; avoid overcrowding the pot, as this can drop the oil temperature. Fry them for 2-3 minutes, turning them occasionally, until they are beautifully golden brown and crispy on all sides.
Step 6: Drain and Prepare for Topping
Once fried to perfection, carefully remove the golden-brown bombs from the hot oil using a slotted spoon. Transfer them immediately to a wire rack that’s been lined with paper towels. This allows any excess oil to drain away, ensuring your crispy cheesecake bombs remain wonderfully light and crunchy. Let them cool slightly while you prepare their whimsical topping.
Step 7: Create Your Cotton Candy Cloud Topping
In separate small bowls, divide your shredded coconut. Add a few drops of pink food coloring to one bowl, blue food coloring to another, and purple food coloring to a third. Mix each bowl thoroughly until the coconut is vibrantly and evenly colored. If you are using cotton candy flavoring, you can lightly spray the colored coconut with a mixture of water and flavoring, or simply mix it into the cream cheese filling before freezing, as mentioned in the notes.
Step 8: Adorn Your Crispy Treats with Color
While the fried bombs are still slightly warm (a little warmth helps the coconut stick!), or if they’ve cooled, you can brush them with a tiny bit of melted butter or corn syrup for adhesion. Gently press the vibrantly colored shredded coconut onto the top and sides of each fried cheesecake bomb. Create a beautiful, multi-colored effect that perfectly evokes fluffy cotton candy.
Step 9: Serve Up the Sweet Spectacle
These delightful treats are absolutely best enjoyed immediately. Serve them right away to experience the ultimate contrast of the crispy exterior and the warm, creamy interior. Each bite promises a burst of flavor and texture that’s utterly irresistible!
Pro Tips for Bomb-Tastic Results
Crafting the perfect crispy cotton candy cheesecake bombs is an art, but these insider tips will ensure your success. First and foremost, meticulously ensuring the cheesecake balls are thoroughly frozen before moving to the coating and frying stages is paramount. This initial freezing prevents them from losing their shape or melting too quickly in the hot oil, maintaining that delightful creamy core. Think of it as building a sturdy foundation for your delicious structure.
When it comes to frying, never overcrowd your pot. This often-overlooked detail can drastically impact your results. Frying in small batches is essential to maintain a consistent oil temperature. A steady temperature guarantees even cooking and that coveted golden-brown, crispy exterior that makes these dessert bombs so irresistible. Patience during this step truly pays off in the texture.
For those who prefer a less oil-intensive approach, consider the versatility of your air fryer. You can air fry the coated bombs at 375°F (190°C) for 8-10 minutes, remembering to flip them halfway through. This method still delivers a fantastic golden and crispy finish, offering a convenient alternative to deep frying without compromising on texture.
To truly amplify the whimsical experience, an enhanced cotton candy flavor can be achieved. A few drops of cotton candy extract can be incorporated directly into the cheesecake filling mixture before freezing, or it can be lightly sprayed onto the colored coconut topping just before serving. This optional step adds another layer of nostalgic sweetness, making each bite even more reminiscent of a carnival treat.
While these crispy, sweet delights are undeniably best enjoyed fresh for their optimal crispness and creamy interior, life happens. Should you find yourself with any leftovers, store them in an airtight container within the refrigerator for up to 2 days. When you’re ready for another moment of indulgence, gently reheat them in an air fryer or even a conventional oven for a few minutes. This quick reheat helps to revive some of that wonderful crispness, ensuring they’re still a delightful treat even on day two. These tips are your secret weapons for consistently amazing results, making every batch of these easy airfryer crispy cotton candy cheesecake bombs a perfect dessert experience.
Serving Suggestions and Nutrition Snapshot

These beautiful bombs are the ultimate showstopper dessert for any gathering. Imagine them artfully arranged on a tiered serving platter at a birthday party, their vibrant colors drawing every eye. They also make a fantastic, individually portioned sweet treat for a movie night or a special brunch. For an extra touch, you could serve them alongside a scoop of vanilla bean ice cream, allowing the creamy coldness to contrast with the warm, crispy bomb. A light dusting of powdered sugar just before serving adds a final elegant flourish, though their colorful coconut topping truly needs no embellishment. Each bite is a journey from the crispy shell to the sweet, soft cheesecake, all framed by that playful cotton candy essence.
Nutrition Information:
- **Servings:** 12-15 bombs
- **Calories:** 280
- **Protein:** 4g
- **Carbs:** 30g
- **Fat:** 18g
Embrace the fun and dive into creating these easy Airfryer Crispy Cotton Candy Cheesecake Bombs – truly a perfect dessert that promises to delight all your senses! They are so much more than just a sweet treat; they are a bite-sized celebration of flavor, texture, and pure joy.
Mastering the Secrets of Cooking
Achieving perfect crispness for these sweet bombs hinges on freezing them solid before breading, then again after coating. This ensures they hold their shape, preventing melting during frying. Always maintain the oil’s 350°F temperature. Fry in small batches for an even, golden crispness.
Make Your Recipe Unique
Infuse these delightful treats with your unique flair! Swap vanilla extract for a hint of almond or orange for a distinct flavor. Experiment with food coloring, perhaps vibrant green and yellow, instead of the classic pink, blue, and purple for a new look. Lightly toasting the shredded coconut adds a nutty layer before coloring.
Smart Storage & Reheating for Your Crispy Cotton Candy Cheesecake Bombs
To preserve the delightful crispness of these dessert bombs, store leftovers in an airtight container in the refrigerator for up to two days. For optimal enjoyment, gently reheat them in an air fryer or oven. This helps restore that coveted golden crunch and creamy center.
The Chef’s Golden Tips
My niece, Lily, once gasped in pure delight seeing these colorful treats. She called them “fairy food!” Moments like that, seeing pure joy, truly remind me why I adore crafting these whimsical cheesecake bombs.
Final Thoughts
There’s truly nothing quite like the experience of biting into these delightful dessert bombs, where a satisfying crunch gives way to a luxurious, creamy cheesecake center. The vibrant, sweet cotton candy topping adds a playful touch, making each one a miniature masterpiece. This recipe delivers a perfectly balanced treat, combining rich flavors with an irresistible texture that is sure to impress. Whether you’re celebrating a special occasion or simply craving something extraordinary, these Easy Airfryer Crispy Cotton Candy Cheesecake Bombs – Perfect Dessert offer a magical moment. Don’t wait – gather your ingredients and create these whimsical delights today!
PrintEasy Airfryer Crispy Cotton Candy Cheesecake Bombs – Perfect Dessert

These dessert bombs present a delightful contrast of textures and flavors. A rich, smooth cheesecake filling is enveloped in a golden, crispy exterior, offering a satisfying crunch with every bite. The bombs are then adorned with a vibrant, fluffy topping in shades of pink, blue, and purple, reminiscent of classic cotton candy, adding a whimsical sweetness and visual appeal.
- Prep Time: 45 minutes
- Cook Time: 15 minutes
- Total Time: 1 hour
- Yield: 12-15 bombs 1x
Ingredients
- For the Cheesecake Filling:
- 8 oz (226g) cream cheese, softened
- 1/4 cup (50g) granulated sugar
- 1 large egg yolk
- 1/2 teaspoon vanilla extract
- For the Coating:
- 1/2 cup (60g) all-purpose flour
- 1 large egg, beaten
- 1 tablespoon milk
- 1 cup (100g) panko breadcrumbs
- For the Topping:
- 1/2 cup (40g) shredded coconut, sweetened
- Pink food coloring
- Blue food coloring
- Purple food coloring
- Optional: 1/4 teaspoon cotton candy flavoring extract
- For Frying:
- 4 cups (960ml) vegetable oil, or enough for deep frying
Instructions
- **Prepare Cheesecake Filling:** In a medium bowl, beat the softened cream cheese and granulated sugar until smooth and creamy. Stir in the egg yolk and vanilla extract until just combined. Do not overmix.
- **Form and Freeze:** Scoop the cheesecake mixture into small, uniform balls (about 1.5 tablespoons each). Place them on a parchment-lined baking sheet and freeze for at least 2-3 hours, or until completely solid. This step is crucial for preventing them from melting during frying.
- **Set Up Breading Station:** Prepare three shallow dishes. In the first, place the all-purpose flour. In the second, whisk the large egg with milk to create an egg wash. In the third, place the panko breadcrumbs.
- **Coat Cheesecake Bombs:** Working with one frozen cheesecake ball at a time, roll it first in the flour, shaking off any excess. Then, dip it into the egg wash, ensuring it is fully coated. Finally, roll it thoroughly in the panko breadcrumbs, pressing gently to ensure a thick, even coating. Return the coated balls to the freezer for at least 30 minutes to ensure the coating adheres well.
- **Fry the Bombs:** Heat the vegetable oil in a deep pot or Dutch oven to 350°F (175°C). Carefully lower 2-3 cheesecake bombs into the hot oil, ensuring not to overcrowd the pot. Fry for 2-3 minutes, turning occasionally, until golden brown and crispy on all sides.
- **Drain and Cool:** Remove the fried bombs with a slotted spoon and place them on a wire rack lined with paper towels to drain any excess oil. Let them cool slightly.
- **Prepare Cotton Candy Topping:** In separate small bowls, divide the shredded coconut. Add a few drops of pink food coloring to one bowl, blue to another, and purple to a third. Mix each thoroughly until the coconut is evenly colored. If using cotton candy flavoring, you can lightly spray the colored coconut with a mixture of water and flavoring, or mix it into the cream cheese filling before freezing.
- **Apply Topping:** While the bombs are still slightly warm (or you can brush them with a tiny bit of melted butter or corn syrup for adhesion), gently press the colored shredded coconut onto the top and sides of each fried cheesecake bomb, creating a vibrant, multi-colored effect.
- **Serve:** Serve immediately for the best crispy exterior and creamy interior.
Notes
* Ensure the cheesecake balls are thoroughly frozen before coating and frying to prevent them from melting too quickly in the hot oil.
* Do not overcrowd the frying pot; fry in small batches to maintain oil temperature and ensure even cooking.
* For an alternative cooking method, you can air fry the coated bombs at 375°F (190°C) for 8-10 minutes, flipping halfway, until golden and crispy.
* For an enhanced cotton candy flavor, a few drops of cotton candy extract can be added to the cheesecake filling or lightly sprayed onto the colored coconut.
* These bombs are best enjoyed fresh, but leftovers can be stored in an airtight container in the refrigerator for up to 2 days. Reheat gently in an air fryer or oven for a few minutes to regain some crispness.
Nutrition
- Calories: 280
- Fat: 18g
- Carbohydrates: 30g
- Protein: 4g
FAQs
Why is freezing the cheesecake mixture important before the coating and frying process?
Freezing the cheesecake mixture thoroughly before you begin coating and frying is an absolutely crucial step for the success of these cheesecake bombs. The instructions specifically state to freeze the formed balls for at least 2-3 hours, or until they are completely solid. This ensures that the delicate cream cheese filling remains firm and holds its shape when it’s introduced to the hot oil. Without proper freezing, the cheesecake could melt too quickly in the fryer, leading to a messy outcome and preventing you from achieving that perfect crispy exterior around a creamy interior.
Can I use an air fryer to cook these delicious dessert bombs instead of deep frying?
Yes, absolutely! While deep frying creates that classic golden crisp, the recipe notes provide an excellent alternative for those who prefer an air fryer. After coating the cheesecake bombs, you can air fry them at 375°F (190°C). Cook them for 8-10 minutes, making sure to flip them halfway through the cooking time. This method will still achieve a wonderfully golden and crispy exterior, making them a fantastic option for these Easy Airfryer Crispy Cotton Candy Cheesecake Bombs. Ensure they are well-coated and evenly spaced in the air fryer basket.
How can I enhance the cotton candy flavor in these Easy Airfryer Crispy Cotton Candy Cheesecake Bombs?
To really bring out that whimsical cotton candy flavor, the recipe offers a couple of fantastic options. You can incorporate a few drops of cotton candy flavoring extract directly into the cheesecake filling mixture before you form and freeze the balls. Alternatively, if you prefer to add the flavor later, you can lightly spray the colored shredded coconut topping with a mixture of water and the flavoring extract. Both methods will infuse your dessert bombs with an extra layer of sweetness and the nostalgic taste of cotton candy, making the colorful topping even more delightful.
What’s the best way to store any leftover cheesecake bombs and how should I reheat them?
These irresistible dessert bombs are definitely best enjoyed fresh to experience their crispy exterior and warm, creamy interior. However, if you happen to have any leftovers, they can be stored in an airtight container in the refrigerator for up to 2 days. When you’re ready to enjoy them again, the recipe suggests reheating them gently. Simply place them in an air fryer or an oven for a few minutes. This gentle reheating method helps to regain some of their wonderful crispness, bringing them closer to their freshly fried state.
Why do I need to freeze the coated cheesecake bombs again before frying?
After you’ve gone through the process of coating each cheesecake ball in flour, egg wash, and panko breadcrumbs, it’s essential to return them to the freezer for at least 30 minutes. This second freezing step is crucial because it helps the breadcrumb coating adhere firmly to the cheesecake mixture. If the coating isn’t sufficiently chilled and set, it might separate or not become as crispy during frying. This extra freezer time ensures a thick, even coating that will create the perfect golden and crunchy shell when cooked.